
An adapter for headphones on your Xbox One instantly enhances your gaming audio. This guide explains what it is, why you need one, and shares simple steps to choose and connect the right adapter for clearer, more immersive Xbox One gaming sound without hassle.
Unlock Immersive Sound: The Essential Xbox One Headphone Adapter Guide

Hey there, fellow gamers and audio lovers! Edward Cavitt here from headphonehorizon. If you’re diving into the world of Xbox One gaming, you’ve probably realized just how much better the experience can be with a quality headset. But what if your favorite headphones don’t seem to, well, connect to your controller?
Don’t sweat it! That’s where a simple, yet game-changing, accessory comes in: the adapter for headphones Xbox One. This little gadget is your ticket to crystal-clear in-game chat, booming soundtracks, and every subtle audio cue that can give you the edge. It’s an essential upgrade that’s easier to understand and use than you might think, and this guide is here to walk you through it all, step by step.
What Exactly is an Xbox One Headphone Adapter?

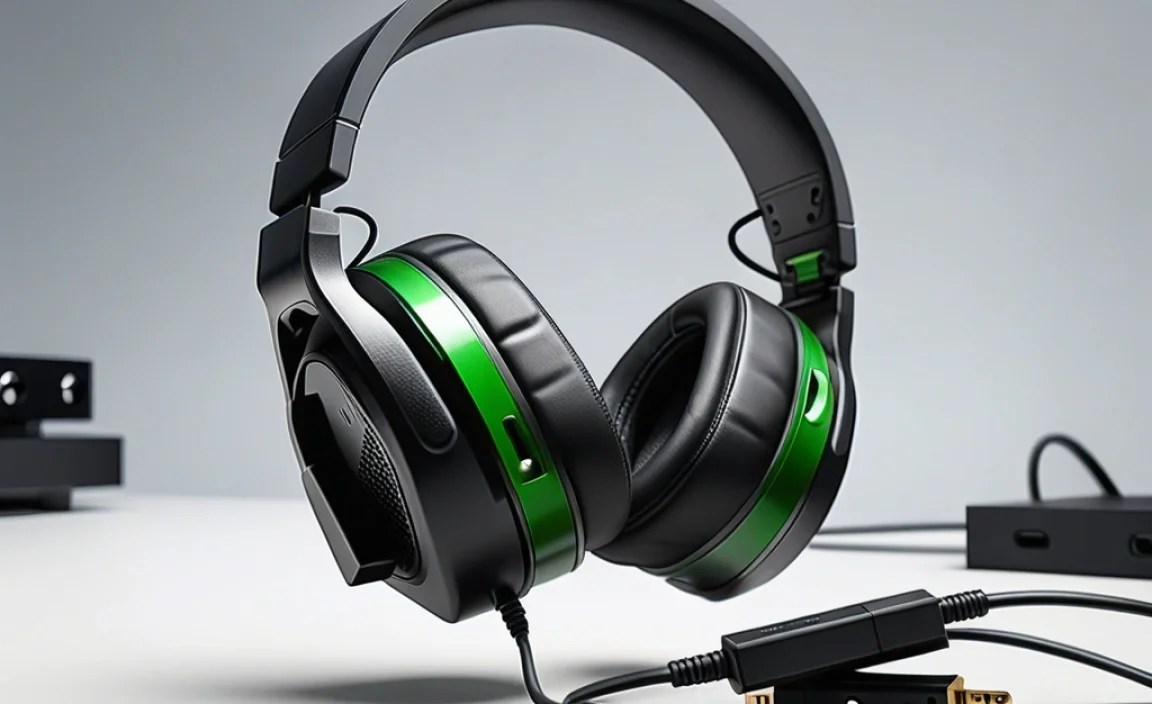
At its core, an adapter for headphones Xbox One is a bridge. It’s designed to connect standard 3.5mm audio jacks (the kind most headphones use) to the proprietary port on your Xbox One controller. Older Xbox One controllers, specifically those without a built-in 3.5mm jack, require this adapter to use modern stereo headsets. Newer controllers often have this jack built-in, but even then, an adapter can sometimes offer additional features or a more secure connection.
Think of it like a universal plug. Your headphones have a universal plug (the 3.5mm jack), and the Xbox One controller has a specific “socket.” The adapter simply makes these two compatible. It takes the audio signal from your game and multiplayer chat and routes it directly to your ears, enhancing your overall gaming immersion by leaps and bounds. This means you can finally hear those footsteps creeping up behind you or get clear, crisp communication with your squad.
Why is an Adapter an “Essential Upgrade”?
For many Xbox One gamers, a dedicated headset is almost a requirement for a truly engaging experience. Here’s why a headphone adapter is more than just an accessory; it’s an upgrade that transforms how you play:
- Enhanced ImmersionHear every explosion, subtle environmental detail, and whispered dialogue as the developers intended. This level of audio detail can pull you deeper into the game world than ever before.
- Clear CommunicationCrucial for online multiplayer. A good headset connected via an adapter ensures you can hear your teammates clearly and your voice comes through crisply, leading to better coordination and strategy.
- Comfort and FamiliarityYou might already own a comfortable pair of headphones you love. Instead of buying an entirely new “gaming headset,” you can use your existing ones, saving money and retaining your preferred fit and sound profile.
- Privacy and FocusGaming can be loud! Using headphones with an adapter allows you to play at any hour without disturbing others and helps you focus by blocking out external distractions.
- Older Controller CompatibilityIf you have an original Xbox One controller, this adapter is essential to connect any standard headset with a 3.5mm jack.
Types of Xbox One Headphone Adapters
When shopping for an adapter for headphones Xbox One, you’ll primarily encounter a couple of main types. Understanding these will help you pick the best fit for your needs:
1. The Official Microsoft Stereo Headset Adapter
This is the most common and widely recognized adapter. Released by Microsoft, it’s designed specifically for the Xbox One controller and offers reliable performance. It typically features physical buttons for volume control, game/chat balance, and microphone muting, all conveniently located on the adapter itself.
2. Third-Party Adapters
Many other companies produce headphone adapters for the Xbox One. These can vary in design, features, and price. Some might offer similar functionalities to the official adapter, while others might be simpler plug-and-play solutions. It’s important to read reviews and check compatibility carefully when considering a third-party option.
3. Built-in 3.5mm Jack (Controller Consideration)
It’s worth noting that Microsoft released updated Xbox One controllers that included a 3.5mm headphone jack directly on the controller. If your controller has this, you might not need an adapter at all! You can simply plug your standard headphones directly into the controller. However, some users find that even with the built-in jack, an adapter can offer better control over audio mixing or a more robust connection.
How to Identify Your Controller Type
Before you buy an adapter for headphones Xbox One, it’s super important to figure out what kind of controller you have. This can save you a lot of confusion and ensure you get the right accessory. Here’s a simple way to check:
- Look at the Bottom ConnectorExamine the connector where you plug in wired controllers or charging cables. You’ll see a rectangular port. To the left of this port, look for a small, circular gap. This is where the headphone adapter typically plugs in.
- Check for a Built-in 3.5mm JackNow, look at the portion of the controller base that wraps around the rectangular port. If you see a small, circular hole with a metal ring around it, that’s your 3.5mm headphone jack. If you have this, you likely don’t need an adapter for most standard headphones.
If your controller doesn’t have the built-in 3.5mm jack but does have the space for the adapter to plug in, then you’ll definitely want to get an adapter for headphones Xbox One. For a more in-depth look at controller types, Microsoft provides detailed information on their support site, which is a great resource for ensuring you have the correct equipment. You can find official guidance on recognizing your Xbox controller version on Microsoft’s official support page.
Step-by-Step: Connecting Your Headset with an Adapter
Connecting your headphones to your Xbox One using an adapter is a breeze. Follow these simple steps, and you’ll be enjoying enhanced audio in no time:
Step 1: Power On Your Xbox One and Controller
Make sure your Xbox One console is on and that your wireless controller is connected and powered up. A solid light on the controller indicates it’s synced.
Step 2: Locate the Controller Expansion Port
Turn your controller over so you’re looking at the underside. Find the rectangular expansion port. If your controller doesn’t have a built-in 3.5mm jack, you’ll see a small recessed area to the left of this port.
Step 3: Attach the Headphone Adapter
Take your Xbox One headphone adapter. Notice the connector on the adapter that matches the shape of the controller’s expansion port. Align this connector with the port on your controller and gently but firmly push the adapter into place. It should click or feel securely seated.
Step 4: Plug Your Headphones into the Adapter
Now, take your headphones, which should have a standard 3.5mm audio plug. Locate the 3.5mm jack on the adapter (it’s usually on the front or side of the adapter). Insert the headphone plug into this jack. You might hear a slight click as it’s connected.
Step 5: Adjust Volume and Settings (If Applicable)
If your adapter has physical controls, take a moment to familiarize yourself with them. You’ll typically find buttons for:
- Volume Up/Down
- Game/Chat Audio Balance (This is super handy for prioritizing game sounds or voice chat)
- Microphone Mute (For when you need a quick break from talking)
You can also fine-tune audio settings within the Xbox One dashboard. Press the Xbox button on your controller, navigate to the “System” tab, then “Audio.” Here, you can adjust master volume, chat mixer, and microphone monitoring levels.
Step 6: Test Your Audio
Launch a game or a voice chat party. Play some in-game music, listen for sound effects, and try talking to a friend. You should now be able to hear everything clearly and communicate effectively. If you experience issues, re-check all connections and consult the troubleshooting section below.
Tips for Choosing the Right Adapter
Navigating the world of accessories can feel overwhelming, but choosing the right adapter for headphones Xbox One is straightforward if you keep a few key things in mind. These tips will help you find a reliable option:
- Controller Compatibility is KeyAs we discussed, the most critical factor is whether your controller has the dedicated expansion port for the adapter. If it has a built-in 3.5mm jack, you might not need an adapter, or you might prefer one for extra controls.
- Consider Your HeadsetWhat kind of headphones are you using? Most standard gaming headsets or even regular stereo headphones with a 3.5mm jack will work. If your headset has a separate plug for the microphone and an audio plug, you might need a Y-splitter cable, though many adapters and newer headsets consolidate this into a single 3.5mm connection.
- Features You NeedDo you want physical buttons for volume and mute, or are you happy to use on-screen menus? Official adapters tend to offer more tactile controls, which many gamers prefer for quick adjustments during intense gameplay. Third-party options might be more streamlined or budget-friendly.
- Brand Reputation and ReviewsFor essential accessories like adapters, sticking with reputable brands (like Microsoft itself) often guarantees better quality and compatibility. However, don’t dismiss third-party options! Reading user reviews on retail sites can give you valuable insights into real-world performance and durability. Look for consistent praise regarding sound quality, build, and ease of use.
- Price vs. ValueWhile budget is always a consideration, remember that a cheap adapter might compromise sound quality or durability. Aim for a balance between cost and features that will serve you well long-term. An adapter is a small investment that significantly boosts your gaming audio experience.
Understanding Adapter Controls: Volume, Balance, and Mute
One of the biggest advantages of using an adapter for headphones Xbox One, especially the official Microsoft model, is the intuitive control it offers over your audio experience. These adapters aren’t just passive connectors; they actively help you manage your sound in real-time. Let’s break down the common controls:
| Control Function | Purpose | How It Enhances Gameplay |
|---|---|---|
| Volume Up/Down | Adjusts the overall loudness of the audio coming from your headset. | Quickly turn down loud explosions during a quiet stealth section, or crank up the audio to catch subtle cues without fumbling for in-game menus. |
| Game/Chat Mixer | Lets you prioritize either game sounds or voice chat audio. You can slide the balance towards game or towards chat. | In a chaotic firefight, you can boost game audio for critical sound effects. When a teammate is giving important instructions, you can shift the balance to ensure you hear them clearly over the game’s audio. |
| Microphone Mute | Instantly disables your microphone so others in the game or party cannot hear you. | Perfect for when you need to speak to someone in the room, take a quick call, or handle personal matters without broadcasting it to your entire squad or lobby. |
These controls are designed for quick access, meaning you can make adjustments on the fly without interrupting your gameplay. This direct control is a significant reason why many gamers prefer using an adapter, even if their controller has a built-in jack.
Troubleshooting Common Adapter Issues
Most of the time, connecting an adapter is seamless. However, if you run into a snag, don’t worry! A few common issues can usually be resolved with simple steps. Here’s how to tackle them:
