
Quick Summary: Finding the best headphones for your snowboard helmet ensures a safer and more enjoyable ride. This guide explains essential features like fit, sound quality, durability, and connectivity, helping you choose headphones that integrate seamlessly with your helmet for clear audio and communication on the slopes.
Best Headphones for Snowboard Helmet: Your Essential Guide
Hitting the slopes with your favorite tunes or important calls can elevate your snowboarding experience. But the wrong audio gear can be uncomfortable, distracting, or even unsafe. That’s where dedicated snowboard helmet headphones come in. Unlike bulky over-ear headphones that might not fit, or earbuds that can fall out, these are designed to slip right into your helmet’s ear pockets. They offer a snug fit, clear sound, and crucial safety features. In this guide, we’ll break down what makes a great pair of snowboard helmet headphones, from essential features to choosing the perfect fit, ensuring your audio is as epic as your shred!
Why You Need Specific Snowboard Helmet Headphones

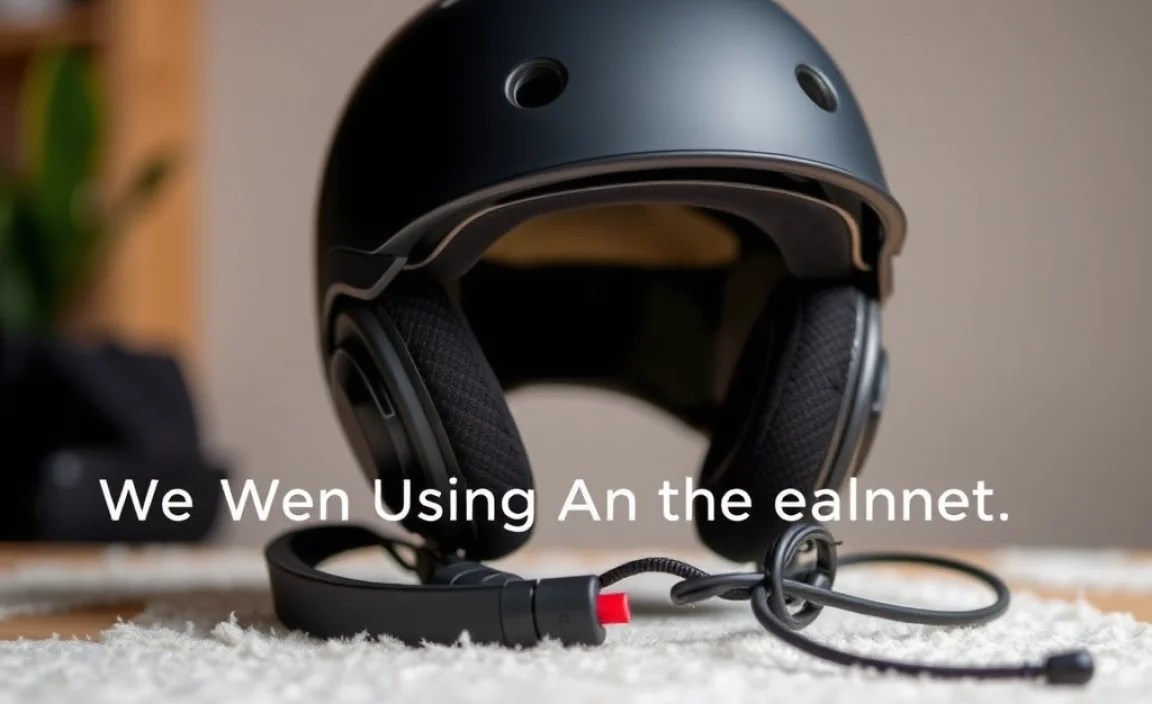
Snowboarding is an active sport, and your gear needs to keep up. Standard headphones often fall short when it comes to helmet compatibility. Imagine trying to cram large, over-ear headphones under a snug helmet – it’s a recipe for discomfort and poor sound quality. Earbuds can lose their seal, especially with the wind and movement, and some might even pose a safety risk by isolating you too much from your surroundings. Snowboard helmet headphones are purpose-built. They’re typically low-profile, designed to fit snugly into the ear cups of most ski and snowboard helmets. This ensures they stay put, provide a decent seal for better sound, and allow your helmet to fit correctly. Safety is paramount; these headphones often balance audio with awareness of your environment, a critical factor on busy slopes.
Key Features to Look for in Snowboard Helmet Headphones

When you’re looking for the best headphones for your snowboard helmet, several features are non-negotiable. These aren’t just about sound; they’re about integration, durability, and maintaining your safety on the mountain.
1. Compatibility and Fit
This is number one for a reason. Snowboard helmet headphones are designed to fit into the dedicated ear pockets found in most modern snowboard helmets. They are usually circular or oval and quite shallow. Look for headphones that are specifically advertised as “helmet audio,” “snow helmet headphones,” or “audio chips.”
- Low Profile Design: The most crucial aspect is that they are slim enough not to create uncomfortable pressure points when your helmet is on.
- Flexible Materials: Some models have flexible bands or slim drivers that conform better to the helmet’s interior padding.
- Universal Fit vs. Specific Models: While many are designed to be universal, some brands offer headphones that pair best with their own helmet lines.
2. Sound Quality
You want to enjoy your music, podcasts, or audiobooks. While these aren’t audiophile-grade equipment, they should provide clear and enjoyable sound, even with wind noise and the rumble of the mountain.
- Driver Size: Larger drivers generally produce richer sound, but remember they need to stay slim. Look for driver sizes around 40mm as a good balance.
- Frequency Response: A wider frequency response means a fuller range of sound, from deep bass to crisp highs.
- Noise Isolation (Passive): The snug fit in your helmet should provide some passive noise isolation, blocking out some wind noise and allowing you to hear your audio better at lower volumes.
3. Durability and Weather Resistance
The mountain environment is harsh. Your headphones need to withstand cold temperatures, moisture (from snow and sweat), and the general wear and tear of being stuffed into a helmet bag.
- Water Resistance (IP Rating): Look for headphones with at least an IPX4 rating, which means they are protected against splashes and sweat. Higher ratings are even better.
- Cold Temperature Performance: Materials can become brittle in extreme cold. Check if the manufacturer indicates performance in low temperatures.
- Robust Cables: If your headphones use a wired connection, ensure the cable is durable and features strain relief to prevent breakage.
4. Connectivity (Wired vs. Wireless)
This is a significant decision. Both have their pros and cons for snowboarding.
- Wired:
- Pros: Generally cheaper, no battery life concerns, no Bluetooth pairing issues.
- Cons: Cable can be a nuisance, snagging risk, may require reaching for your phone to control playback.
- Wireless (Bluetooth):
- Pros: Tangle-free, easier device switching, often include integrated controls.
- Cons: Battery life needs management, potential for Bluetooth connection drops, usually more expensive.
For wireless, ensure the Bluetooth version is reasonably current (e.g., Bluetooth 5.0 or higher) for better stability and battery efficiency.
5. Controls and Microphone
Being able to control your audio or take a call without fumbling for your phone is a huge convenience and safety feature. Many modern helmet headphones include integrated controls.
- On-board Controls: Buttons on the cable (for wired) or directly on the headphone unit (for wireless) allow you to play/pause, skip tracks, adjust volume, and answer calls.
- Microphone Quality: If you plan on taking calls, look for reviews that mention microphone clarity, especially in windy conditions. Some models employ noise-canceling techniques for calls.
6. Battery Life (for Wireless)
A full day on the slopes can be 6-8 hours or more. You don’t want your audio dying halfway through your last run. Check the advertised battery life and consider bringing a portable power bank if you opt for wireless and are always on the go.
7. Helmet Integration Systems
Some helmet manufacturers have their own audio systems that are designed to be perfectly integrated into their helmets. These are often the most seamless but might be more expensive or limited to specific helmet models.
Types of Snowboard Helmet Headphones

When you start shopping, you’ll see a few common forms these helmet headphones take. Understanding them will help you narrow down your choices.
1. Audio “Chips” or Discs
These are the most common type. They are typically small, circular units that house the speaker and sometimes electronics (Bluetooth receiver, battery, controls). They slide into the ear pockets of your helmet and secure with Velcro or a tight fit.
Pros: Highly versatile, fit in most helmets, often very low-profile.
Cons: Sound quality can vary greatly, can sometimes shift if not secured well.
2. Integrated Ear Pad Speakers
Some helmets come with built-in ear pads that have dedicated speaker pockets. You can then purchase audio accessories designed to slot directly into these. Other helmets have completely integrated audio systems where the speakers are a permanent part of the ear pads.
Pros: Often the most secure and comfortable fit, designed for specific helmets.
Cons: Limited to compatible helmets, can be more expensive.
3. Neckband Style (Less Common for Snowboarding)
While not ideal for active sports like snowboarding due to potential snagging and fit issues with helmets, some flexible neckbands with small earbuds might be adaptable. However, this is generally not recommended for optimal performance and safety on the slopes.
Step-by-Step Guide: Choosing and Installing Your Snowboard Helmet Headphones

Ready to find the perfect audio companion for your next snowy adventure? Follow these steps:
Step 1: Assess Your Current Helmet
Before you buy any headphones, check your snowboard helmet. Does it have dedicated ear pockets? Most modern helmets do, usually lined with soft fabric or padding. Look inside where your ears would be – you should see a slight indentation or a removable ear pad designed to accommodate speakers.
Action: Gently feel the inside of your helmet’s ear areas. Note their shape and depth.
Step 2: Determine Your Connectivity Preference
Consider whether you prefer the freedom of wireless or the simplicity of wired headphones.
- Wireless: If you value being tangle-free and easy control, go wireless. Make sure to check battery life and Bluetooth version.
- Wired: If you’re on a budget, don’t want to worry about charging, and don’t mind a cable, wired is a solid choice.
Action: Decide if you want Bluetooth or a wired connection.
Step 3: Research and Compare Models
Now it’s time to dive into the specifics. Look for models that align with your needs identified in the “Key Features” section. Read reviews from other snowboarders and skiers to get real-world feedback.
Here are some popular brands and types to get you started:
| Feature | Audio Chips (e.g., Outdoor Tech, Skullcandy, JBL) | Integrated Helmet Systems (e.g., Smith, Giro, Bern) |
|---|---|---|
| Compatibility | Most helmets with ear pockets | Specific helmet models/brands |
| Installation | Slide in, often secured with Velcro or fit | Slot into pre-designed pockets, sometimes permanent |
| Price Range | $30 – $150+ | Can be $50 – $150+ (accessory) or included with helmet |
| Pros | Versatile, affordable options, easy to swap between helmets | Seamless fit, often designed for optimal acoustics, durable |
| Cons | Sound and fit can vary, may shift | Less versatile, tied to specific helmet |
Step 4: Check Specifications Carefully
Don’t just buy based on brand. Look at:
- Dimensions: While hard to find sometimes, very slim profiles are usually best.
- IP Rating: Aim for IPX4 or higher for splash and sweat resistance.
- Battery Life: For wireless, ensure it meets your expected on-mountain time.
- Bluetooth Version: 5.0 or higher is recommended for stable connections.
Step 5: Purchase Your Headphones
Once you’ve made your decision, it’s time to buy! Consider buying from reputable retailers or directly from the manufacturer’s website for the best support and return policies.
Step 6: Installation in Your Helmet
This is where the magic happens. Most audio chips will come with instructions, but the general process is straightforward:
- Remove Helmet Ear Pads (if possible): Many helmets allow you to easily detach the ear pads. This gives you better access to the speaker pockets.
- Identify Left and Right: Audio chips are usually marked left (L) and right (R).
- Insert the Speaker: Carefully slide the speaker into the corresponding ear pocket. It should fit snugly. Some come with Velcro patches to help secure them in place.
- Check the Fit: Re-attach the ear pads. Put the helmet on without the speakers first, then with them. Ensure there are no uncomfortable pressure points. The goal is a secure fit where the speaker is flush against your ear.
- Manage Cables (for Wired): If you have a wired setup, route the cable carefully. You can often tuck it under helmet lining or run it down the back of the helmet and inside your jacket. Most wired models come with a 3.5mm audio jack that connects to your phone or music player.
- Pairing (for Wireless): Turn on your wireless headphones and put your helmet on. Follow the manufacturer’s instructions to pair them with your smartphone or music device. This usually involves holding down a button to enter pairing mode.
Step 7: Test and Adjust
Before you head to the mountain, test everything out. Play some music, make a call, and walk around with your helmet on.
- Audio Check: Do you hear clear sound? Is the volume adequate?
- Fit Check: Is the helmet still sitting comfortably? Are there any points of pressure? Adjust the speaker position slightly if needed.
- Control Check: Can you easily use the buttons to control playback and volume?
The goal is to have the headphones so well integrated that you almost forget they’re there, until you want to enjoy your audio!
Safety Considerations When Using Audio on the Slopes
While enjoying music is great, listening on the slopes introduces safety considerations. The National Ski Areas Association (NSAA) and similar safety organizations often advise caution when using audio devices.
- Maintain Situational Awareness: Your primary concern on the mountain is your safety and the safety of others. Be aware of your surroundings.
- Keep Volume Low: This is crucial. The goal is to hear your audio, not to drown out the mountain. You need to be able to hear approaching skiers, snowboarders, snowmobiles, and avalanche warnings. A good rule of thumb is to keep the volume at a level where you can still clearly hear ambient sounds. Many snowboarding headphones offer a good balance, allowing decent audio without complete isolation.
- Consider One Earbud Out (if applicable): If using earbuds that fit your helmet, consider keeping one ear uncovered or never using both. However, dedicated helmet audio is designed to mitigate this risk by allowing sound through.
- Avoid Distractions: Looking at your phone to change songs or adjust volume can take your focus away from riding. Use headphones with integrated controls whenever possible.
- Be Mindful of Speed: The faster you go, the more ambient noise you’ll encounter, and the more critical your awareness becomes. Adjust your listening habits accordingly.
Remember, the mountain is dynamic. Avalanches, changing weather conditions, and unexpected obstacles require your full attention. Helmets with integrated audio designed for this environment are generally safer than improvising with standard headphones, but caution and responsible listening are always essential.
Top Tips for Snowboard Helmet Headphone Care
To ensure your headphones last and perform well on countless mountain adventures, follow these care tips:
- Drying: After a day on the slopes, always remove your headphones from the helmet to air them out and dry them completely. Moisture is the enemy of electronics.
- Cleaning: Gently wipe down the speakers and any control surfaces with a soft, dry cloth. For stubborn grime, a slightly damp cloth (water only) can be used, but ensure no moisture gets inside the speaker drivers.
- Storage: Store your headphones in a cool, dry place. If they came with a pouch, use it. Avoid leaving them in extreme temperatures (like a hot car in summer or a freezing garage in winter) for extended periods.
- Cable Care (Wired): Avoid tightly coiling or sharply bending the cable, as this can damage the internal wires. Leave a gentle curve when storing.
- Battery Care (Wireless): For long-term storage, charge wireless headphones to around 50-70% battery. Avoid storing them completely depleted or fully charged for months on end, as this can degrade battery health.
- Avoid Harsh Chemicals: Never use alcohol, solvents, or abrasive cleaners on your headphones.
Frequently Asked Questions (FAQ)
Q1: Can I use regular headphones with my snowboard helmet?
While you can try, regular over-ear headphones are unlikely to fit comfortably or securely under a snowboard helmet. Earbuds might fit, but they can fall out easily or not provide a good seal for sound quality. Dedicated helmet audio is designed for this specific purpose, offering a much better experience and fit.
Q2: How do I know if my helmet has ear pockets for audio?
Most modern snowboard helmets are designed with ear warmer pads that have a dedicated space or pocket specifically for small, flat audio speakers or “chips.” Feel inside the ear area of your helmet; if there’s a removable padded section or a defined recess, it’s likely designed for audio integration.
Q3: Are Bluetooth headphones safe to use while snowboarding?
Yes, Bluetooth headphones can be safe, provided you practice safe listening habits. The main safety aspect is maintaining situational awareness. Keep the volume at a level where you can still hear your surroundings. Bluetooth offers the advantage of being tangle-free, which can itself be a safety benefit.
Q4: How long should the battery life of my wireless snowboard headphones be?
A good set of wireless snowboard headphones should offer at least 6-8 hours of battery life on a single charge. Many high-quality models can provide up to 10-15 hours. Consider your typical day on the mountain; if you’re out for
