
Quick Summary: Discover the best studio headphones for recording with this beginner’s guide. Learn what to look for – open-back vs. closed-back, comfort, sound isolation, and crucial features. Make informed choices for clear mixes and better music creation.
Hey there, fellow music lovers and aspiring creators! Edward Cavitt here from Headphone Horizon. Ever found yourself staring at a wall of headphones, wondering which ones are actually good for recording music? It can feel a bit overwhelming with all the tech talk, right? Well, take a deep breath! This guide is your friendly handshake into the world of studio headphones. We’re going to demystify what makes a pair “best” for recording, focusing on what truly matters to you: getting clear, accurate sound for your projects. Forget the confusing jargon; we’re keeping it simple and practical so you can make a choice that feels right and helps your music sound its absolute best.
Why Studio Headphones Matter for Recording

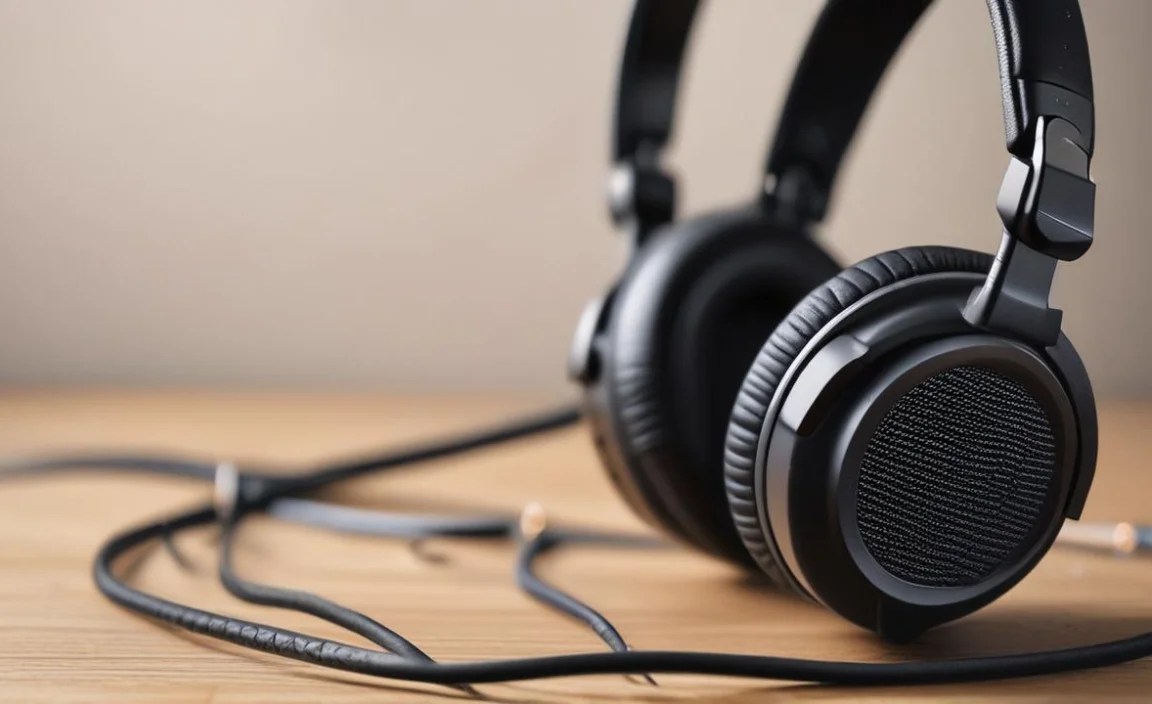
When you’re laying down tracks – whether it’s a booming bassline, a delicate vocal, or a soaring guitar solo – you need to hear exactly what’s going on. Regular consumer headphones are often designed to make music sound exciting, sometimes boosting bass or treble. While fun for casual listening, this coloring of the sound can be a big problem in the studio. You might mix your song thinking it sounds great, only to find it sounds totally different on other systems. Studio headphones, on the other hand, are built for accuracy. They aim to provide a flat, neutral frequency response. This means they present the sound as faithfully as possible, without adding their own “flavor.” This is crucial for making critical decisions about your mix, ensuring clarity, and identifying any unwanted noise or imperfections. Think of them as your honest audio mirror – they show you the true picture, allowing you to record and mix with confidence.
Understanding the Key Types: Open-Back vs. Closed-Back
When you start looking for studio headphones, you’ll quickly encounter two main types: open-back and closed-back. Each has its own strengths and weaknesses, making them suitable for different roles in the recording process.
Open-Back Headphones
Open-back headphones have earcups that are not fully sealed. You can often see through them to the drivers inside. This design allows air and sound to pass freely in and out.
Pros of Open-Back Headphones:
- Natural Soundstage: The open design creates a wider, more natural-sounding soundstage. This means instruments can feel more separated and you can better pinpoint their placement in the stereo field, much like you would when listening in a real room.
- Less Ear Fatigue: Because air can circulate, your ears tend to stay cooler and feel less fatigued during long listening or mixing sessions.
- Reduced Pressure: They generally don’t build up as much pressure around your ears, leading to a more comfortable listening experience over time.
Cons of Open-Back Headphones:
- Sound Leakage: A significant amount of sound leaks out of the earcups. This means if you’re recording vocals or an instrument with a microphone nearby, the headphone sound can bleed into the microphone, creating an unwanted echo or distraction in your recording.
- Poor Noise Isolation: Conversely, they let a lot of external noise in. This makes them less ideal for noisy environments or situations where you need to focus solely on the audio without distractions.
- Not for Detailed Monitoring of Loud Sources: While great for mixing, they aren’t the best for monitoring loud live instruments directly if you’re trying to avoid bleed.
Closed-Back Headphones
Closed-back headphones have earcups that are sealed, creating a barrier between the inside of the headphone and the outside world.
Pros of Closed-Back Headphones:
- Excellent Sound Isolation: Their primary advantage is their ability to block out external noise. This is invaluable when you need to concentrate on your audio without distractions, or when recording with microphones.
- Minimal Sound Leakage: They keep the sound contained within the earcups, preventing it from leaking out and being picked up by microphones. This makes them the go-to choice for tracking vocals, acoustic instruments, and any situation where microphone bleed is a concern.
- Good for Live Monitoring: Their isolation makes them suitable for monitoring louder instruments or performances where you need to hear clearly without the headphone sound interfering with the room sound or other microphones.
Cons of Closed-Back Headphones:
- Smaller Soundstage: The sealed nature can sometimes lead to a more confined soundstage, making instruments sound a bit closer together.
- Potential for Ear Fatigue: They can sometimes feel a bit warmer or more “stuffy” around the ears, potentially leading to fatigue during very long sessions.
- Can Alter Bass Response: The seal can sometimes affect the natural decay of bass frequencies, though high-quality closed-back designs often mitigate this.
What to Look for in Recording Headphones

Beyond the open vs. closed-back decision, several other factors contribute to the “best” recording headphones for your needs. Let’s break them down:
1. Sound Accuracy (Frequency Response)
This is arguably the most critical factor. As mentioned, studio headphones should have a “flat” or “neutral” frequency response. This means they reproduce audio across the entire audible spectrum (roughly 20Hz to 20kHz) with minimal exaggeration or attenuation. Why does this matter? It ensures that what you hear is an honest representation of the audio. When you make EQ adjustments or decide on levels, you’re doing so based on the true sound, not a hyped-up version. Look for headphones marketed as “flat response,” “studio,” or “reference” headphones. While perfect flatness is an ideal that’s hard to achieve, good studio headphones get very close.
According to the Bay Area Video Coalition’s Audio Recording Guide, “Accurate monitoring is essential for making informed decisions during the recording and mixing process. Headphones that color the sound can lead to mixes that do not translate well to other playback systems.”
2. Comfort and Fit
You’ll likely be wearing these headphones for hours on end, especially during extended recording or mixing sessions. Discomfort can be a major distraction and can even affect your focus and creativity. Key comfort considerations include:
- Earpad Material: Velour or breathable fabric earpads are often more comfortable than pleather for long wear as they reduce heat buildup.
- Clamping Force: The pressure the headphones put on your head. Too loose, and they might fall off; too tight, and they become uncomfortable. Adjustable headbands help.
- Weight: Lighter headphones are generally more comfortable for long sessions.
- Earcup Size: Ensure the earcups are large enough to fully encompass your ears (over-ear or “circumaural”) rather than pressing on them (on-ear).
3. Durability and Build Quality
Studio gear gets used, moved around, and sometimes even stressed. Headphones that are built to last are a wise investment. Look for:
- Robust materials (metal in the headband, durable plastics).
- Detachable cables. This is a huge plus, as cables can be a common point of failure. If the cable breaks, you can simply replace it without needing new headphones.
- Reinforced joints and hinges.
4. Impedance and Sensitivity
These technical specs can affect how well the headphones work with your audio interface or amplifier.
- Impedance (measured in Ohms, Ω): This refers to the headphone’s resistance to electrical current.
- Low Impedance (under 32Ω): Generally easier to drive and will work well with most devices, including laptops and mobile phones.
- High Impedance (over 50Ω, often 250Ω or more): Typically require a dedicated headphone amplifier to reach sufficient listening volumes and deliver their best sound quality. They often produce a cleaner, more detailed sound when properly amplified.
- Sensitivity (measured in dB): This indicates how loud the headphones will get for a given amount of power. Higher sensitivity means they get louder more easily.
For home recording with a standard audio interface, headphones with lower to medium impedance (around 32Ω to 80Ω) are usually a safe bet. If you have a dedicated headphone amp or a higher-end interface with a strong headphone output, you can explore higher impedance options for potentially greater detail.
5. Detachable and Replaceable Cables
This is a feature many overlooked until their cable breaks! Headphones with detachable cables are fantastic because:
- Easy Replacement: If a cable gets damaged, frayed, or stops working, you can easily unplug it and buy a new one. This is far cheaper and more convenient than replacing the entire headphone unit.
- Customization: You can often buy longer, shorter, or different types of replacement cables (e.g., coiled, straight, with different connectors).
- Durability: A secure connection point on the headphone is often more robust than a permanently attached cable.
Top Considerations for Recording Sessions

Let’s think about the specific tasks in recording and how headphone choice plays a role.
For Tracking (Recording Instruments/Vocals)
When recording, the primary goal is to capture a clean signal and prevent headphone audio from bleeding into the microphone. This almost always means you’ll be reaching for closed-back headphones.
- Isolation is key: You need to hear yourself (or the musician playing) clearly without the backing track or metronome escaping the headphones and being picked up by the microphone.
- Comfort for the performer: While accuracy is important, the performer also needs to be comfortable wearing them for extended periods while playing.
- Durability: Performers can be rougher on gear, so a sturdy build is a plus.
Example Scenario: A singer performing in a vocal booth. They need to hear the instrumental track and their own voice (if using near-zero latency monitoring) clearly, but the headphone sound must not reach the condenser microphone. Closed-back, heavily isolating headphones are essential here.
For Mixing and Mastering
Once the recording is done, you move to mixing (balancing levels, EQ, effects) and mastering (final polish). This is where accuracy and detail are paramount, and where open-back headphones often shine, though high-quality closed-backs can also be excellent.
- Flat Frequency Response: You need to hear exactly what’s in the audio, without any boosts or cuts. This allows you to make precise EQ decisions and identify subtle problems.
- Wide Soundstage: An open, natural soundstage helps you accurately place instruments in the stereo image and make decisions about panning and spatial effects.
- Reduced Ear Fatigue: Mixing can take a long time. The cooler, more natural presentation of open-backs can make these sessions less draining.
Example Scenario: An engineer is EQing a drum kit. They need to hear precisely how the kick drum’s low-end sits, how the snare’s transient cuts through, and whether the cymbals are too harsh. An open-back headphone with a flat response will give them the most honest feedback for these critical adjustments.
Recommended Features for Beginners
If you’re just starting out, don’t get overwhelmed by every single spec. Focus on these beginner-friendly features:
- Closed-back design: Generally the most versatile for a beginner, as they cover both tracking and general listening needs without bleed issues.
- Comfortable, over-ear fit: Essential for long sessions. Look for plush earpads.
- Detachable cable: A huge lifespan-extender for your headphones.
- Reasonable Impedance (under 80Ω): Will likely work directly with your computer or audio interface without needing an extra amplifier.
- Good Reviews for “Neutral” or “Flat” Sound: Look for descriptions that emphasize accuracy rather than excitement.
Popular Studio Headphones for Recording
While the “best” is subjective and depends on your budget and specific needs, here are a few well-regarded models that are popular in studios and often recommended for beginners and intermediate users. These are consistently praised for their value and performance.
| Model | Type | Price Range (USD) | Key Features | Best For |
|---|---|---|---|---|
| Audio-Technica ATH-M50x | Closed-Back | $150 – $180 | Excellent isolation, durable build, detachable cables, balanced sound. | Tracking vocals & instruments, general studio use, commuting. Versatile. |
| Sennheiser HD 280 Pro | Closed-Back | $100 – $130 | Great isolation, solid build, good value, clear mid-range. | Budget-friendly tracking, monitoring, noisy environments. |
| Beyerdynamic DT 770 Pro (80 Ohm version) | Closed-Back | $150 – $200 | Comfortable velour pads, robust build, excellent isolation, detailed sound. | Tracking, monitoring, long mixing sessions needing isolation. |
| AKG K240 Studio | Semi-Open Back | $60 – $80 | Semi-open design offers a taste of open-back soundstage at a budget, detachable cable. | Beginner mixing, casual listening, light tracking where isolation isn’t critical. |
| Presonus Eris HD10BT | Closed-Back | $130 – $150 | Comfortable, good isolation, Bluetooth option for convenience, balanced sound. | Tracking, general monitoring, flexible use with or without cables. |
Note: Prices are approximate and can vary based on retailer and promotions.
Setting Up Your Studio Headphones
Getting your headphones ready to use is usually straightforward. The process depends on where you’re plugging them in.
Connecting to an Audio Interface
Most audio interfaces have a dedicated headphone output jack, usually a 1/4-inch (6.35mm) or sometimes a 1/8-inch (3.5mm) mini-jack, often with an adapter included.
- Locate the Headphone Output: Find the headphone jack on the front or back of your audio interface.
- Check Your Cable: Your headphones will likely come with a cable that has a 3.5mm plug on one end. Many studio headphones also include a 1/4-inch screw-on adapter.
- Connect:
- If the headphone jack on your interface is 3.5mm, plug the headphone cable directly in.
- If the headphone jack on your interface is 1/4-inch, screw the 1/4-inch adapter onto the 3.5mm plug of your headphone cable and then plug it into the interface.
- Adjust Volume: Find the headphone volume knob on your interface and start with it at a low setting.
- Select Output: In your Digital Audio Workstation (DAW) software or computer’s sound settings, make sure the audio interface is selected as the output device. Often, you can route your main output to your interface’s master outputs, and the headphone jack will mirror this.
Connecting to a Computer (Without an Audio Interface)
Many computers have a headphone jack built-in. While convenient, the audio quality might not be as good as with an interface, and the headphone output might not be very powerful for higher impedance headphones.
- Locate the Headphone Jack: This is usually on the side or front of a laptop, or the back of a desktop PC.
- Connect: Plug your headphones’ 3.5mm jack directly into the computer’s headphone port.
- Adjust Volume: Use your computer’s volume controls. Start low.
- Select Output: In your computer’s sound settings (or your DAW), ensure the computer’s built-in sound card is selected as the audio output device.
Using a Headphone Amplifier
If you have higher impedance headphones (e.g., 250Ω Beyerdynamic DT 990 Pro or Sennheiser HD 600), they might sound quiet or lack bass impact when plugged directly into a computer or basic interface. A headphone amplifier provides more power.
- Connect Source to Amp: Connect your audio interface
