
Quick Summary: Upgrading your headphone cable with a microphone offers a significant audio and call quality boost. This guide helps beginners understand why it’s essential, how to choose the right cable, and step-by-step instructions for a seamless replacement, ensuring better sound and clearer communication for your everyday listening and calls.
Hey there, audiophiles and everyday listeners! Edward Cavitt here, your guide to making headphones sound and perform their best. Ever feel like your headphone experience could be, well, better? Maybe your calls are a bit muffled, or you just suspect your music isn’t quite hitting all the right notes. Often, the culprit isn’t your headphones themselves, but the humble cable connecting them. A good cable for headphones with mic isn’t just a wire; it’s a crucial component that can dramatically improve your audio fidelity and the clarity of your voice during calls. Think of it like upgrading from a basic car tire to a performance one – the difference is substantial! This guide is designed to make that upgrade simple and stress-free, even if you’re new to the world of audio accessories. We’ll demystify why a better cable matters and walk you through selecting and using one, so get ready to enhance your listening and communication game!
Why an Upgradeable Cable for Headphones with Mic is More Than Just an Accessory

You might be wondering, “Why bother with a new cable? My headphones came with one.” That’s a fair question! The cable that comes bundled with most headphones, especially in-ear types, is often designed for basic functionality and cost-effectiveness rather than peak performance. A dedicated, high-quality cable for headphones with a mic can offer several distinct advantages:
- Improved Sound Quality: Better materials and construction in an aftermarket cable can lead to a cleaner, more detailed sound. This means richer bass, clearer mids, and crisper highs, allowing you to truly appreciate your music or the nuances in podcasts and audiobooks.
- Enhanced Microphone Performance: If you use your headphones for calls, gaming, or any voice communication, a cable with a superior microphone can make a world of difference. Expect clearer voice pickup, reduced background noise, and a more natural-sounding tone.
- Increased Durability and Longevity: Stock cables can be prone to fraying, tangling, and internal wire breakage, especially with daily use. Upgraded cables are often built with more robust materials, better strain relief, and reinforced shielding to withstand wear and tear.
- Customizable Fit and Comfort: Many upgrade cables come with different lengths, ear hooks, or a more comfortable braiding that reduces cable noise (microphonics) – that annoying rustling sound you hear when the cable brushes against your clothes.
- Compatibility and Flexibility: Need to connect your headphones to a different device or a new audio setup? An upgradeable cable with standard connectors can give you the flexibility to adapt to various audio sources and devices.
Essentially, a good cable for headphones with mic acts as a vital bridge between your ears and your audio source, and optimizing that bridge can unlock the full potential of your listening experience. It’s an accessible way to make a tangible improvement without needing to buy entirely new headphones.
Understanding the Anatomy of a Headphone Cable

Before we dive into choosing a new cable, let’s quickly break down what makes up a typical headphone cable. Understanding these parts will help you make a more informed decision:
1. The Connector(s)
These are the bits that plug into your headphones and your audio source. The most common types are:
- 3.5mm (1/8 inch) TRS/TRRS: This is the standard headphone jack found on most smartphones, laptops, and portable audio players.
- TRS (Tip, Ring, Sleeve): Used for stereo audio output only (no microphone).
- TRRS (Tip, Ring, Ring, Sleeve): Used for stereo audio output AND microphone input. This is what most headphone cables with mics use for smartphones and newer devices.
- 2.5mm: Less common, but sometimes found on older or specialized audio equipment.
- 6.35mm (1/4 inch) TS/TRS: Found on professional audio gear like amplifiers, mixers, and some home stereo systems.
- Proprietary Connectors: Some headphones, particularly higher-end audiophile models, use specific connectors (like MMCX or 2-pin configurations) that plug directly into the earbud or headphone housing. If your headphones have detachable cables with these, you’ll need a replacement cable with the same connector type.
2. The Cable Wire
This is the conductive material that carries the audio signal. The quality of the wire matters:
- Copper: The most common conductor. Higher purity copper (like OFC – Oxygen-Free Copper) is generally preferred for better conductivity and signal integrity, leading to clearer sound.
- Silver-Plated Copper (SPC): Often marketed for enhancing treble and detail.
- Braided Cables: Woven strands of wires. This can make the cable more durable and less prone to tangling, and can also reduce microphonics.
3. The Insulation and Shielding
This outer layer protects the wires and prevents external interference (like radio waves or electromagnetic fields) from affecting your audio signal. Good shielding is crucial for maintaining audio clarity, especially in noisy environments.
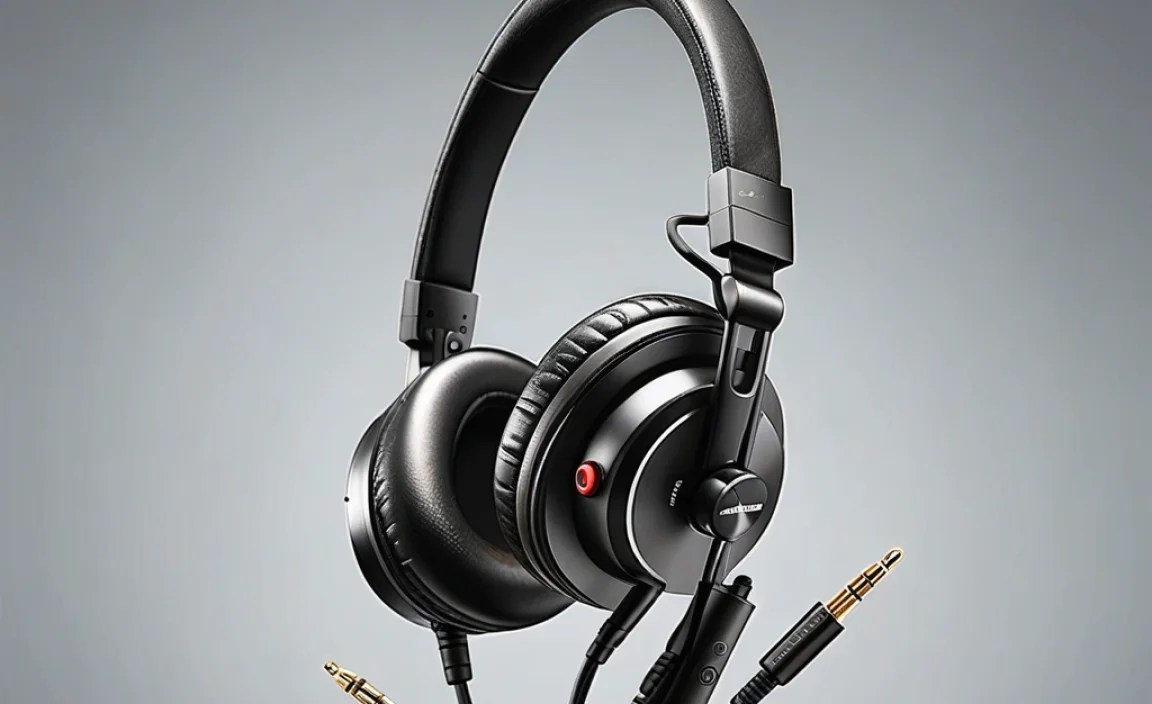
4. The In-line Microphone and Controls
For a cable for headphones with mic, this module typically sits on one side of the cable, allowing you to control playback, adjust volume, and speak. The quality of the microphone capsule and the processing circuitry within this module significantly impacts call quality.
5. The Y-Splitter and Strain Relief
The Y-splitter is the point where a single cable typically splits into two wires, one for each earcup. Strain relief is the flexible material at connector points that prevents the cable from bending too sharply and breaking internally. Good strain relief is a sign of a well-made cable.
When to Consider an Upgrade: Signs Your Current Cable Isn’t Cutting It

Not sure if it’s time to upgrade? Here are a few tell-tale signs that your current headphone cable might be holding you back:
- Intermittent Audio/Dropouts: If you experience one or both earcups cutting out randomly, especially when you move the cable, it’s a classic sign of internal wire damage or a loose connection.
- Distorted or Fuzzy Sound: Crackling, static, or a general lack of clarity, particularly in certain frequencies, can indicate a failing cable or poor shielding.
- Unclear Microphone: Friends, family, or colleagues complain they can’t hear you clearly during calls, or your voice sounds muffled, distant, or full of background noise.
- Tangling Nightmares: If your current cable is a constant battle to untangle and it obstructs your listening enjoyment, a less tangle-prone aftermarket cable is a breath of fresh air.
- Physical Damage: Obvious fraying, kinks, exposed wires, or a damaged connector are clear indicators that a replacement is needed for safety and performance.
- Lack of Features: Your current cable doesn’t have an in-line mic, or it lacks media controls when you need them.
Choosing the Right Cable for Headphones with Mic: A Beginner’s Checklist

Ready to find your perfect upgrade? Here’s a step-by-step approach to selecting a replacement cable for your headphones with a mic:
Step 1: Identify Your Headphone’s Connector Type
This is step one! Look at where the cable plugs into your headphones. Do you see two small pins on each side (2-pin)? Or perhaps a small circular connector (MMCX)? Many headphones, especially TWS earbuds or those designed for gaming, have detachable cables. If your headphones don’t have detachable cables, you’ll typically be looking for a replacement cable that plugs into the standard 3.5mm jack of your device, and the headphones themselves will have a specific plug.
For example, if your headphones have recessed 2-pin connectors, you’ll need to buy a cable with 2-pin plugs that match your specific headphone model. Always double-check your headphone’s manual or the manufacturer’s website if you’re unsure.
Step 2: Determine the Connector for Your Audio Source
Where will you be plugging in?
- Most Smartphones/Laptops: You’ll likely need a 3.5mm TRRS connector (the kind with four segments on the plug) to support both audio and microphone functionality. If your device only has a USB-C or Lightning port, you’ll need an adapter or a cable with the appropriate digital connector.
- Desktop Computers: Many PCs have separate jacks for headphones and a microphone (often color-coded green and pink). In this case, you might need a 3.5mm TRS cable and a separate microphone, or a TRRS cable paired with a Y-splitter adapter.
- Gaming Consoles/Hi-Fi Systems: These vary widely. Some use standard 3.5mm jacks, while others might use larger 6.35mm jacks or proprietary inputs.
Step 3: Consider the Microphone and Controls
Do you want just a basic microphone, or do you need in-line controls for volume, play/pause, and track skipping? Most cables designed for smartphones feature these controls. For gamers, a boom microphone might be preferable for clearer voice chat.
Step 4: Think About Cable Material and Construction
- Braided Nylon/Fabric: Excellent for durability and reducing tangles and microphonics.
- TPE (Thermoplastic Elastomer) or PVC: Common, more flexible, but can sometimes tangle more easily.
- Oxygen-Free Copper (OFC): A good standard for clear audio transmission.
- Silver-Plated Copper (SPC) or Pure Silver: Can offer a brighter, more detailed sound profile, though this is subjective and highly dependent on overall cable quality.
Step 5: Cable Length and Y-Splitter Design
Standard lengths are usually between 1.2m (4ft) and 1.5m (5ft). Consider how you’ll be using your headphones. Shorter cables are tidier for mobile use, while longer ones are better for desk setups.
The Y-splitter is where the cable divides. Some are minimalist, while others are more robust. Some cables also feature a chin slider, which can be helpful for securing the cable and preventing it from moving around during use.
Step 6: Read Reviews and Check Compatibility
Once you’ve narrowed down your options, read reviews from other users, especially those with similar headphone models. Check the product description for explicit compatibility with your headphones. Reputable brands often provide lists of compatible models or specific connector types.
How to Replace Your Headphone Cable: A Step-by-Step Guide
Replacing a headphone cable is usually quite straightforward. The process varies slightly depending on whether your headphones have detachable cables or a standard audio jack.
Scenario A: Headphones with Detachable Cables (e.g., 2-Pin, MMCX)
This is the most common scenario for a true “upgrade” where you’re swapping out the primary cable that came with premium headphones or earbuds.
Tools You Might Need:
- Your new replacement cable specifically designed for your headphone model.
- A soft, lint-free cloth (optional, for cleaning ports).
- Good lighting.
Steps:
- Identify the Detachable Ports: Examine your headphones. You’ll see small sockets where the original cable plugs in. Common types are 2-pin (two small cylindrical sockets) or MMCX (a small circular connector).
- Gently Detach the Old Cable:
- For 2-Pin: The cable connectors usually slide directly into the sockets. Grasp the connector firmly but gently and pull it straight out. Avoid wiggling too much, as this can damage the pins or sockets.
- For MMCX: These are designed to swivel. Grasp the connector and gently pull straight away from the headphone housing. They might require a bit more force than 2-pin, but should detach with a straight pull.
- Inspect the Ports: Briefly look inside the sockets on your headphones. Ensure there’s no debris or visible damage. You can gently clean them with a dry, lint-free cloth if needed.
- Connect the New Cable: Align the new cable’s connectors with the ports on your headphones.
- For 2-Pin: Ensure the orientation is correct (most have a slight notch or indicator). Gently push the connector straight into the socket until it feels secure and flush.
- For MMCX: Align the connector with the headphone housing’s socket. Gently push and twist slightly until it “clicks” or feels securely seated.
- Ensure Proper Fit: For headphones with ear hooks or specific cable routing (like over-ear loops), make sure the new cable is positioned correctly for comfort and a secure fit.
- Test Both Sides: Plug the other end of the cable into your audio source and test both left and right earcups, as well as the microphone.
Scenario B: Replacing a Non-Detachable Cable via the 3.5mm Jack
This scenario is less about “upgrading” the cable itself in terms of physical connectors into the headphone, and more about replacing a damaged or inferior cable attached to headphones that have a standard 3.5mm plug. If your headphones have a permanently attached cable with a 3.5mm plug, you can’t easily swap the cable. However, if you have headphones with detachable cables that plug into a device via 3.5mm, then the whole cable is replaceable as described in Scenario C.
Scenario C: Replacing a Cable that Plugs into Both Device and Headphone via 3.5mm
This applies to headphones that have a permanently attached cable on the headphone side, but the other end has a detachable 3.5mm plug that goes into your phone, computer, etc. Sometimes even these cables have proprietary connectors on the headphone side, but often they are standardized removable cables.
Tools You Might Need:
- Your new replacement cable with the appropriate 3.5mm (TRS or TRRS) connector.
- A soft, lint-free cloth (optional).
Steps:
- Unplug the Old Cable: Gently pull the existing 3.5mm plug from your audio source (phone, computer, etc.).
- Disconnect from Headphones (if applicable): If your headphones have a socket where the cable detaches (often at the earcup, but not always the two-pin or MMCX type mentioned earlier, sometimes a single 3.5mm jack), unplug it from there.
- Connect the New Cable: Plug the new cable’s 3.5mm connector into your audio source. If your headphones have a socket for the cable, plug the other end into the headphones.
- Test: Play some audio and test the microphone.
Important Note: Always ensure the cable you purchase is compatible with your specific headphone model and the intended audio source. If unsure, contact the manufacturer or seller for clarification.
Troubleshooting Common Cable Issues
Even with a new cable, you might encounter minor hiccups. Here are some common issues and how to resolve them:
- No Sound / One Side Not Working:
- Check Connections: Ensure the cable is fully seated at both the headphone and device ends.
- Check Source Volume: Make sure the volume is up on your device and the cable’s in-line controls (if applicable).
- Try on Another Device: Test the headphones and cable with a different audio source to rule out a device issue.
- Verify TRRS/TRS: Ensure you’re using the correct type of plug for your device’s jack (e.g., TRRS for mic support on phones).
- Microphone Not Working:
- Check TRRS: Confirm your cable is TRRS and your device supports microphone input via the 3.5mm jack.
- Software Settings: On computers or some apps, you might need to select the correct microphone input device in your audio settings.
- Ensure Mic Mute is Off: Some in-line controls have a mute switch.
- Cable Noise (Microphonics):
- Secure the Cable: Use a chin slider or clip the cable to your clothing to reduce movement and contact with fabrics.
- Braided Cables: Braided cables often have better microphonic properties than smooth plastic ones.
- Frayed or Damaged Cable: While an upgrade should be more durable, always inspect cables for signs of wear, especially around the connectors. If damage occurs, replace the cable to avoid audio interference or potential electrical hazards.
