
Quick Summary: Don’t let a loose headphone jack silence your audio! This guide offers simple, beginner-friendly solutions to repair your connection. From cleaning to minor soldering, discover genius repair techniques to restore your sound and get back to enjoying your music with confidence.
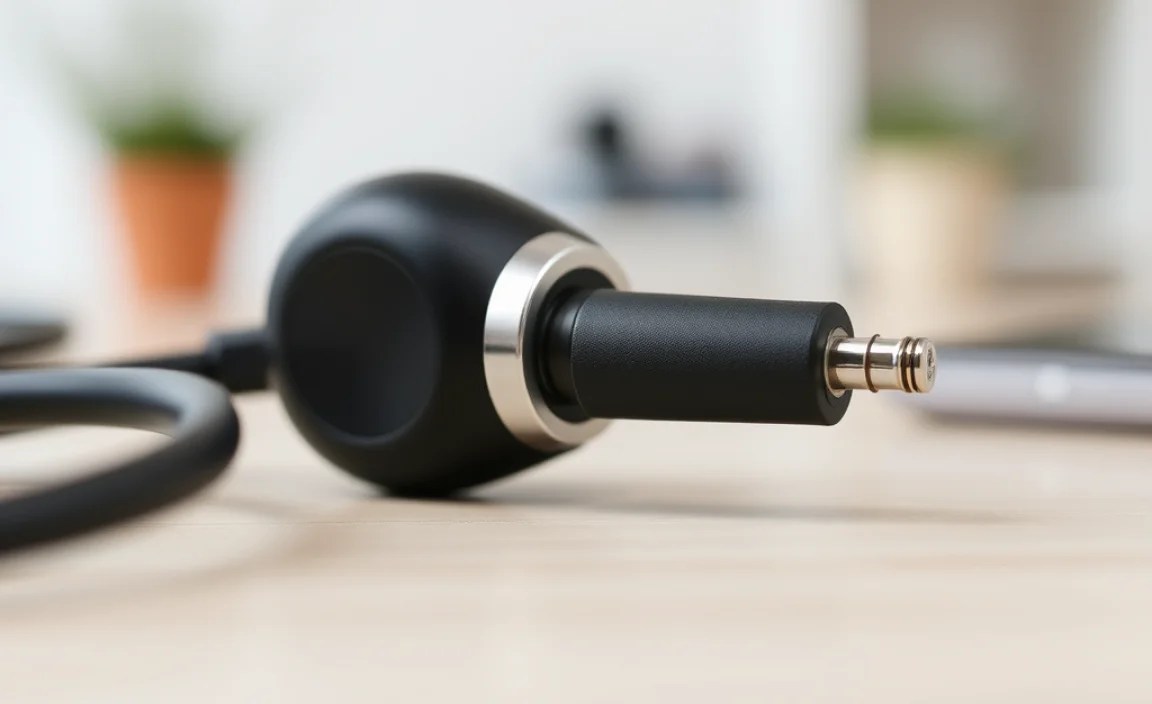
There’s nothing quite like the frustration of having your music, podcast, or important call cut out just as things are getting good. A loose headphone jack is a common annoyance that can plague even the most premium audio gear. Instead of immediately thinking about buying a new pair, did you know many of these intermittent audio issues can be fixed with a little know-how and a few simple tools? At Headphone Horizon, we believe in maximizing the life of your beloved headphones, and that includes tackling those pesky connection problems. This guide is designed for everyone, whether you’re a seasoned audiophile or just someone who loves to listen, providing clear, actionable steps to get your sound crystal clear again.
Why Your Headphone Jack Might Be Loose (And What It Means)
Before we dive into the fixes, let’s briefly understand what’s happening when your headphone jack feels loose or your audio starts cutting out. The headphone jack is a critical interface. It’s essentially the gateway for your audio signal to travel from your device (phone, computer, tablet) to your headphones. When this connection weakens, intermittent audio, static, or even complete sound loss can occur.
Several factors can lead to a loose headphone jack:
- Wear and Tear: The constant plugging and unplugging of headphones can loosen internal connections over time.
- Physical Damage: Dropping your device or headphones, or snagging the cable, can stress the connection point.
- Dirt and Debris: Accumulation of dust, lint, or other grime inside the headphone port can interfere with a solid connection.
- Internal Component Failure: Less commonly, the solder points inside the device or the jack itself might have failed.
Understanding these causes helps us pinpoint the most effective solutions. The good news is that most of these issues are repairable, often without needing to be an electronics expert!
Assessing the Problem: Is It the Jack or the Cable?
The first crucial step is to figure out where the problem lies. Is the headphone jack itself on your device loose and wobbly? Or is it that the audio cuts out when you move the cable near the jack?
Troubleshooting Steps to Isolate the Issue:
- Test with Different Headphones: Plug in a known-good pair of headphones into your device. If the problem persists, the issue is likely with your device’s headphone jack.
- Test with Different Devices: Plug your problematic headphones into a different audio source (e.g., another phone, a tablet, a computer). If the audio cuts out with these headphones on multiple devices, the problem is almost certainly with the headphone cable itself.
- Gentle Viggling Test: With your headphones plugged in and audio playing, gently wiggle the headphone connector where it plugs into the device.
- If the audio cuts out or changes drastically only when you wiggle the cable right at the plug, the problem is likely within the cable’s strain relief or the internal wiring of the jack itself.
- If the audio cuts out or is inconsistent even when the plug is held perfectly still, or if the plug feels very loose inside the port, the issue is more likely with the device’s port.
This initial diagnosis is super important. It saves you time and effort by directing you to the right fix.
The Genius Repair Solutions: From Simple to Advanced
Now that you have a better idea of what might be wrong, let’s explore the solutions. We’ll start with the easiest fixes that require minimal tools and expertise, moving towards more involved repairs.
Solution 1: The Deep Clean – Clearing Out Debris
This is the simplest and often most effective solution, especially if your device’s headphone port feels a bit “grimy” or the plug doesn’t go in all the way. Lint, dust, and other pocket-dwelling particles love to build up in these ports.
Tools You’ll Need:
- Compressed air can
- Toothpick (wooden or plastic, avoid metal)
- Cotton swabs (optional, for very specific cleaning)
- Rubbing alcohol (Isopropyl alcohol, 70% or higher, optional)
Step-by-Step Cleaning Guide:
- Power Down: Always turn off your device before attempting any cleaning or physical interaction with ports.
- Initial Blast: Take your compressed air can and, holding it upright, give a short, sharp burst directly into the headphone jack. Use the straw attachment for better aim. This can dislodge loose debris.
- Gentle Probing (If Needed): If compressed air doesn’t do the trick, take a wooden or plastic toothpick. Carefully insert it into the jack and gently scrape along the sides and bottom. Be extremely careful NOT to push too hard or bend the internal contacts. The goal is to loosen stubborn debris, not to pry anything.
- Finer Cleaning (Optional): For very stubborn grime, you can lightly dampen a very fine needle or a thin piece of paper with a tiny amount of isopropyl alcohol and carefully clean the inside walls of the jack. Ensure it dries completely before powering your device back on. A dry cotton swab can also be used very carefully around the outer edges of the port if needed, but avoid pushing it deep inside.
- Final Blast: Give another short burst of compressed air to clear out any loosened debris.
- Test: Power your device back on and plug in your headphones. See if the connection is more secure and the audio is clear.
This method is fantastic for fixing intermittent audio caused by poor contact due to port obstruction. It’s quick, safe, and requires no special skills.
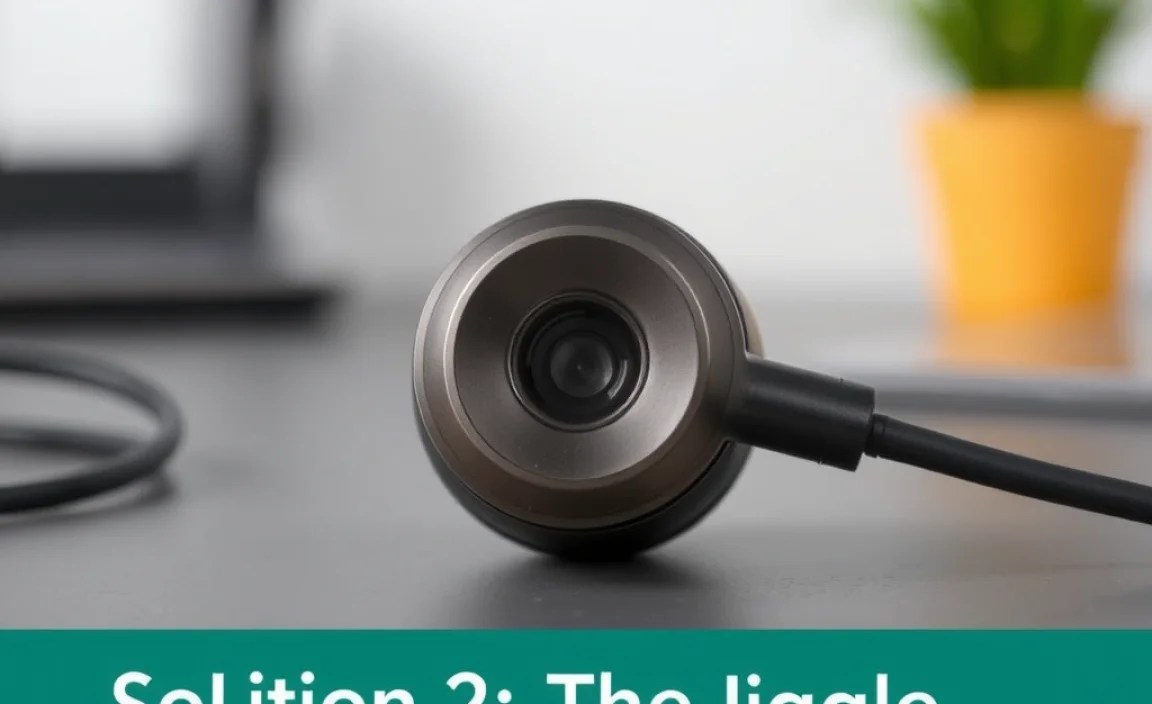
Solution 2: The Cable Jiggle – Addressing Cable Strain

If your troubleshooting pointed to the headphone cable itself, the issue often lies where the cable enters the actual headphone plug. This is called the “strain relief,” and it can weaken or break, causing internal wires to fray.
Tools You’ll Need:
- Heat shrink tubing (various small diameters)
- Heat gun or a reliable lighter/hair dryer
- Wire stripper/cutter (small gauge)
- Small Phillips head screwdriver (if the plug is a screw-together type)
- Patience!
Step-by-Step Cable Fix:
- Inspect the Plug: Look closely at the point where the headphone cable meets the metal plug. Is there a rubber or plastic sleeve that is cracked, torn, or significantly bent?
- Disassemble the Plug (If Possible): Many headphone jacks are designed to be unscrewed. Gently try to twist the metal housing of the plug. If it unscrews, carefully pull it apart. You might find a small circuit board or simply wires connected to a central pin.
- Check Internal Wires: Once the plug is open, examine the wires connecting to the internal pins. Look for any breaks, frayed strands, or loose solder points. If you see a broken wire, this is your culprit.
- Repairing Broken Wires (Requires Soldering Skill):
- If a wire is clearly broken, you’ll need to re-solder it to its original connection point. This requires basic soldering skills and equipment. If you’re new to soldering, practice on some old electronics first.
- Carefully strip a tiny bit of insulation (about 1-2mm) from the broken wire.
- Tin both the wire and the connection point on the plug’s internal assembly.
- Solder the wire back in place.
- Reinforce the Strain Relief (No Soldering Needed): Even if wires are intact, reinforcing the weak point is a smart preventative measure.
- Cut a piece of heat shrink tubing that is long enough to extend about 1cm (less than half an inch) onto the cable and about 1cm onto the metal plug housing.
- Slide the heat shrink tubing over the cable and up to the strain relief point.
- If you had to open the plug, carefully reassemble it, ensuring wires are not pinched.
- Shrink the tubing. Apply heat from a heat gun (or carefully with a lighter/hair dryer, keeping it moving to avoid melting plastic) until the tubing shrinks tightly around the cable and plug. This creates a new, robust strain relief.
- Test: Reassemble any plug components, plug in your headphones, and test the audio.
This fix is more involved, especially if soldering is required. However, it’s a common and highly effective solution for cable-related connection issues. For those uncomfortable with soldering, sometimes buying a replacement headphone jack and cable assembly is a more practical route if the internal wires are too damaged.
Solution 3: The Device Port Wobble – Reinforcing Internal Connections
If your testing indicates the headphone jack on your device is loose and moves around internally, this is a more delicate repair. It often involves the solder points on the motherboard of your device connecting to the headphone jack. This is where “genius repair” can get a bit more technical.
Disclaimer: This repair involves opening your device and working with sensitive internal components. If you are not comfortable with this, it’s best to seek professional help or consider the cost of repair versus a new device. Static electricity can damage components, so grounding yourself is crucial.
Tools You’ll Need:
- Small Phillips head screwdrivers (appropriate for your device)
- Spudger or plastic prying tool
- Magnifying glass or microscope
- High-quality soldering iron with a fine tip
- Solder wire (thin gauge, e.g., 0.5mm)
- Flux paste
- Desoldering braid or desoldering pump
- Anti-static wrist strap
- Ideally, a service manual for your specific device (search online for your device model + “service manual PDF”)
Step-by-Step Device Port Reinforcement:
- Find a Guide: Locate a detailed teardown or service manual for your specific device model. This is non-negotiable for a successful repair. Websites like iFixit are excellent resources for guides.
- Gather Tools and Prepare: Ensure you have all necessary tools, especially those for ESD (Electrostatic Discharge) protection like an anti-static wrist strap. Work on a clean, well-lit, static-free surface.
- Safely Disassemble Your Device: Follow your guide meticulously to open the device and access the headphone jack. This often involves removing screws, prying apart plastic clips, and disconnecting ribbon cables. Keep track of screws and their locations.
- Locate Headphone Jack Solder Points: The headphone jack is usually mounted to the device’s logic board. It may be a separate module or soldered directly. Identify the pins or pads where the jack connects to the board.
- Inspect the Solder Joints: Using your magnifying glass or microscope, carefully examine the solder joints. Look for cracked solder, cold joints (dull, grainy appearance), or any signs of damage.
- “Re-flowing” the Solder (If Joints Look Okay but Damaged):
- Apply a small amount of flux paste to the suspect solder joints.
- Using your fine-tipped soldering iron, gently touch each joint for a few seconds. The heat will help re-melt the existing solder, allowing it to flow properly and create a stronger connection.
- Be careful not to overheat or bridge solder between adjacent pins.
- Re-soldering Weak Joints (If Clearly Damaged):
- If a solder joint is clearly broken, or if re-flowing doesn’t solve it, you may need to re-solder it.
- Apply flux to the joint and the tip of your soldering iron.
- Gently heat the old solder until it melts, then add a tiny amount of new solder to create a fresh, shiny joint. Ensure good adhesion to both the component pin and the board pad.
- Desoldering and Re-soldering (For Severe Damage): If the jack itself is severely damaged or a primary solder point is ruined, you might need to desolder the entire jack, clean the pads, and then resolder it. This is the most advanced step and requires significant soldering skill. Use desoldering braid or a pump to remove old solder.
- Clean Up: Remove any excess flux residue with an appropriate electronics cleaner and a brush.
- Reassemble: Carefully reassemble your device, ensuring all cables are reconnected correctly and no screws are left out.
- Test: Power on your device and test the headphone jack with headphones.
This is a “genius” fix because it tackles the root cause of internal device port issues. However, it’s also the most challenging and carries the most risk. If your device is still under warranty, this kind of repair will void it. Check out resources like iFixit’s guide on preventing ESD damage to understand the risks involved.
Preventative Maintenance: Keep Your Jacks Happy!
Once you’ve fixed your loose headphone jack, it’s a great idea to implement some preventative measures to avoid future problems. Thinking ahead is key to long-lasting audio gear.
Tips for Headphone Jack Longevity:
- Handle with Care: Always remove headphones by gripping the plug, not by yanking the cable.
- Invest in a Case: For portable headphones, a sturdy carrying case protects the jack and cable from damage when not in use.
- Avoid Extreme Bending: Don’t wrap your headphone cables too tightly, and avoid leaving them severely bent or kinked for extended periods.
- Keep Ports Clean: Once in a while, give your headphone port a quick blast of compressed air to prevent debris buildup.
- Consider Wireless: For ultimate freedom from cable issues, wireless headphones are a great option, though they come with their own set of considerations like battery life and charging.
When to Call a Professional (Or Consider Replacement)
While many headphone jack issues are DIY-friendly, there are times when professional help is the best route, or when it’s time to consider new headphones.
Signs You Should Not DIY:
- Damage to Connected Components: If the headphone jack is part of a larger, expensive component (like a sound card on a motherboard) and it’s damaged, a specialized repair service might be required.
- Lack of Confidence: If you’re not comfortable with tools, electronics, or the potential for making the problem worse, it’s better to let a professional handle it.
- Warranty Concerns: If your device is still under warranty, attempting a repair will almost certainly void it. Contact the manufacturer first.
- Extensive Damage: If the headphone jack is physically broken off, or there’s visible widespread damage to the port or surrounding circuitry, it may be beyond simple repair.
When to Replace Your Headphones:
- Cost of Repair vs. New: Sometimes, the cost and effort of repairing an older or cheaper pair of headphones might not be worth it.
- Overall Condition: If the headphones are old, the drivers are failing, the earcups are worn out, and the cable is also damaged, a new pair might offer a better overall experience.
- Frequency of Issues: If you find yourself constantly fixing loose jacks on the same pair, it might be a sign of inherent design flaws or simply the end of their lifespan.
For professional repair services, look for electronics repair shops that specialize in mobile devices or audio equipment. You can often get a quote before committing to the service.
FAQ: Your Headphone Jack Questions Answered
Q1: My audio cuts out when I move the cable near the plug. What’s the easiest fix?
The easiest fix is often to reinforce the strain relief at the base of the plug. You can do this by carefully applying a small amount of super glue (CA glue) around the base of the plug where the cable enters, creating a stronger bond. For a more robust solution, using heat shrink tubing (as described in Solution 2) is excellent. Always test gently after applying!
Q2: Can I use a Q-tip to clean my headphone jack?
Yes, but very carefully. A dry Q-tip is generally safe for cleaning the outer edges. If you need to clean deeper, it’s better to use a wooden or plastic toothpick to gently dislodge debris and then a burst of compressed air. Cotton fibers from a Q-tip can sometimes get left behind, making the connection worse.
