
Quick Summary:
Experiencing issues with your over-ear headphones? This guide offers proven, beginner-friendly fixes for common problems like no sound, distorted audio, and connectivity issues. We’ll help you get your beloved headphones working perfectly again with simple, step-by-step solutions.
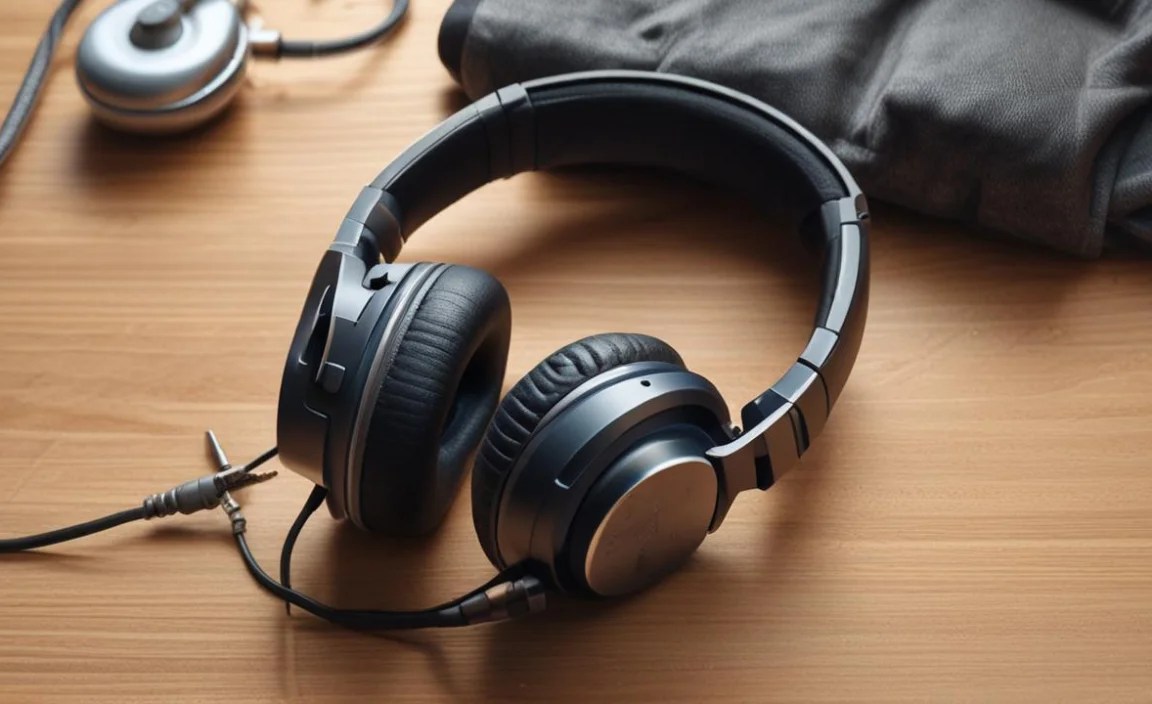
Hey everyone, Edward Cavitt here from Headphone Horizon! There’s nothing quite like sinking into your favorite music or podcast with a pair of comfortable over-ear headphones. They’re our portals to immersive sound. But what happens when that portal starts glitching? Suddenly, there’s no sound, the audio is crackly, or your Bluetooth connection keeps dropping. It can be frustrating when your audio experience hits a snag! Don’t worry, though. Most common headphone problems are surprisingly easy to fix without needing to be a tech wizard. We’re going to walk through some simple, effective troubleshooting steps designed for over-ear headphones, so you can get back to enjoying crystal-clear audio in no time. Let’s dive in!
Common Over-Ear Headphone Problems and Their Fixes
Over-ear headphones, while fantastic for comfort and sound quality, can sometimes present a few common headaches. These issues range from a complete lack of sound to audio that just doesn’t sound right. The good news is that many of these are straightforward to resolve. We’ll tackle them one by one, starting with the most frequent culprits.
1. No Sound at All (or Only in One Ear Cup)

This is perhaps the most alarming problem. You plug in your headphones, press play, and… silence. Or maybe you hear something, but it’s only coming from one side. Let’s troubleshoot this step-by-step.
Check the Basics: The “Is It Plugged In?” Moment

It sounds obvious, but the simplest checks often solve the most vexing issues. Don’t underestimate this step!
- Is the headphone jack fully inserted? Sometimes, a partially plugged-in jack can lead to no sound or sound in only one ear. Gently push the plug all the way into the port.
- Is the volume up? Double-check the volume controls on both your device (phone, computer, tablet) and your headphones themselves, if they have independent volume controls.
- Is the correct audio output selected? On computers and some other devices, you can choose which audio device to use. Make sure your headphones are selected. For example, on Windows, right-click the speaker icon in the taskbar and select your headphones under “Choose your output device.” On macOS, go to System Preferences > Sound > Output and select your headphones.
Inspect the Cables and Connections

The physical link between your headphones and your device is crucial. Damage here is a common cause of sound issues.
- Wiggle the Plug: Gently wiggle the headphone jack where it plugs into your device. If you hear popping sounds or the audio cuts in and out, it suggests a loose connection or a damaged cable at the plug.
- Examine the Cable: Look for any visible signs of damage along the entire length of the headphone cable – kinks, frays, cuts, or exposed wires. Pay close attention to the areas near the earcup and the headphone jack.
- Detachable Cables: If your headphones have a detachable cable, try unplugging it and then re-plugging it firmly into both the headphones and the device. Sometimes a faulty connection at this point can cause problems. If you have a spare compatible cable, try using that to see if it resolves the issue.
Test on a Different Device
This is a powerful diagnostic step. By testing your headphones on another audio source, you can determine if the problem lies with the headphones themselves or your original device.
- Connect your headphones to a different smartphone, tablet, laptop, or MP3 player.
- If the headphones work perfectly on the second device, the issue is likely with your original device’s audio port or settings.
- If the headphones still have no sound or only sound in one ear, the problem is almost certainly with the headphones themselves.
2. Distorted, Crackly, or Muffled Audio
If you’re getting sound, but it’s unpleasant to listen to – full of static, distortion, or sounding like it’s underwater – several factors could be at play.
Clean Your Earcups and Grilles

Accumulated earwax, dust, and debris can muffle sound and even cause crackling by obstructing speaker grilles.
- Materials Needed:
- Soft, dry brush (like a clean toothbrush or makeup brush)
- Mild soap and water solution (very dilute)
- Clean, lint-free cloths
- Cotton swabs (optional, for detailed cleaning)
- Cleaning Steps:
- Detachable Earcups: If your earcups are removable (check your manual), gently detach them. Use a dry, soft brush to carefully remove loose debris from the earcup padding and the speaker grille underneath.
- Non-Removable Earcups/Grilles: If earcups aren’t removable, carefully use a dry, soft brush to clean around the edges and any exposed grille areas. Be very gentle to avoid pushing debris further in.
- Damp Cloth (Use Sparingly): For tough grime on the earcup padding, dampen a lint-free cloth very slightly with the mild soap and water solution. Wring it out thoroughly so it’s almost dry. Gently wipe the earcup surfaces. Avoid getting moisture into the speaker grille or internal components.
- Drying: Always allow earcups to dry completely before reattaching or using the headphones. A few hours is usually sufficient.
- Grille Cleaning (Cautiously): For speaker grilles, use a very dry, soft brush. If you need to use a cotton swab, make sure it’s dry and run it very lightly over the grille. Never push forcefully.
- Important Note: Never submerge your headphones or their components in water or cleaning solutions.
Check Your Audio Source and Settings
Sometimes, the issue isn’t with the headphones at all, but with the audio file or the playback software.
- Try Different Audio Files: Play a known, high-quality audio file or stream. If only certain files sound bad, the issue is with those files.
- Check Equalizer (EQ) Settings: If you’re using an app or device with EQ settings, they might be pushed to extremes, causing distortion. Reset EQ settings to default and see if the audio improves.
- Isolate the Source/App: Does the distortion happen in all apps, or just one? If it’s just one app, the problem is likely with that app’s settings or a bug.
Inspect for Physical Damage
Beyond cable damage, internal driver damage can occur from drops or impacts.
- Gentle Inspection: Carefully look for any cracks or damage on the earcup housings. While you can’t usually fix internal driver damage yourself, identifying external signs can confirm if a drop might be the cause.
3. Bluetooth Connectivity Issues (Dropping, Not Pairing)
Wireless headphones offer freedom, but sometimes that freedom is interrupted by flaky Bluetooth connections.
Restart and Re-pair
The classic “turn it off and on again” often works wonders for Bluetooth.
- Turn off Bluetooth: On your device (phone, computer), switch Bluetooth off for about 30 seconds, then switch it back on.
- Restart Headphones: Power your headphones off completely, wait a few seconds, and then power them back on.
- Forget and Re-pair: On your device, go to your Bluetooth settings. Find your headphones in the list of paired devices, select “Forget Device” or “Unpair.” Then, put your headphones back into pairing mode (usually by holding the power button or a dedicated Bluetooth button until a light flashes) and re-pair them through your device’s Bluetooth menu.
Check Distance and Obstructions
Bluetooth signals have a limited range and can be disrupted.
- Stay Close: Keep your headphones and the audio source within the recommended Bluetooth range (typically around 30 feet or 10 meters).
- Minimize Interference: Other wireless devices (microwaves, Wi-Fi routers, other Bluetooth devices) can interfere. Try moving away from potential sources of interference. Thick walls or metal objects can also degrade the signal.
Update Device Software/Drivers
Outdated software on your source device can cause compatibility issues.
- Mobile Devices: Ensure your smartphone or tablet is running the latest operating system version. Check for iOS or Android updates in your device’s settings.
- Computers: On Windows or macOS, ensure your operating system and Bluetooth drivers are up to date. You can usually find driver updates through your computer manufacturer’s support website or your operating system’s update manager. For more information on updating Bluetooth drivers on Windows, this guide from the U.S. Government’s Computer Hardware Assurance Program can be helpful: NIST Guidance on Software Security (While this link is broad, it points to authoritative sources for tech updates).
Charge Your Headphones
Low battery can sometimes lead to erratic Bluetooth performance.
- Ensure your headphones have a sufficient charge. Connect them to their charger and let them power up before attempting to connect again.
4. Microphone Not Working (for Calls/Voice Chat)

If your headphones have a built-in microphone and it’s not picking up your voice, here’s what to check.
Permissions and Settings
Modern operating systems and apps require explicit permission for microphone access.
- App Permissions: Check the settings of the specific app you’re using (e.g., Zoom, Discord, your phone’s dialer) to ensure it has permission to access your microphone.
- Operating System Permissions:
- Windows: Go to Settings > Privacy > Microphone and ensure “Allow apps to access your microphone” is turned on, and then check the list of apps below to ensure the specific app you’re using is allowed.
- macOS: Go to System Preferences > Security & Privacy > Privacy tab. Select “Microphone” from the left-hand list and check the box next to the applications you want to grant microphone access to.
- Smartphones (iOS/Android): Similar controls exist in your phone’s Settings app under “Privacy” or “Apps” where you can manage microphone permissions for individual applications.
Select the Correct Microphone Input
Just as with audio output, you need to ensure the correct microphone is selected.
- Device Settings: On computers, right-click the speaker icon in the taskbar (Windows) or go to System Preferences > Sound > Input (macOS) and select your headphone’s microphone as the input device.
- In-App Settings: Many communication apps (like Zoom, Skype, etc.) have their own audio settings where you can specifically choose which microphone to use. Make sure your headphone’s mic is selected within the app.
Check the Microphone Mute Switch
Some headphones have an inline mute switch on the cable or a button on the earcup. Ensure it’s not accidentally engaged.
Test the Microphone
Use your device’s built-in tools to test the microphone.
- Windows: Search for “Sound settings,” then under “Input,” select your microphone and click “Device properties.” You’ll see a meter that moves when you speak.
- macOS: Go to System Preferences > Sound > Input. Speak into the microphone and watch the “Input level” meter.
- Smartphones: Use a voice memo app or a specific microphone testing app.
5. Distorted Bass or Weak Bass

Bass is the foundation of many music genres. If it’s off, the whole listening experience suffers.
Seal of Approval: The Earcup Fit

For over-ear headphones, a good seal is critical for bass reproduction. Leaks allow bass frequencies to escape.
- Check Earpad Condition: Over time, earpads can degrade, lose their shape, or shrink, creating gaps. If your earpads look worn, flat, or cracked, they might need replacement.
- Proper Fit: Ensure the earcups are sitting completely and evenly around your ears, forming a seal against your head. Sometimes adjusting the headband or the angle of the earcups can improve the seal.
- External Factors: Wearing glasses or having hair that significantly disrupts the seal can also impact bass.
EQ Adjustments
Once again, your equalizer settings can be the culprit.
- Too Much Bass: If the bass is distorted or sounds “boomy,” your EQ might be over-boosting the low frequencies. Try slightly reducing bass levels.
- Not Enough Bass: If the bass is weak, a gentle boost to the lower frequencies (around 60-250 Hz) in your EQ might help, but do this gradually to avoid distortion.
Physical Damage
As mentioned before, dropped headphones can suffer from damaged drivers, affecting all frequencies, including bass.
Troubleshooting Table: Problem vs. Likely Cause
Here’s a quick reference to help you diagnose common over-ear headphone issues:
| Problem | Likely Cause(s) |
|---|---|
| No Sound / One Ear Silent | Loose connection, damaged cable, incorrect audio output setting, software glitch, faulty headphone driver. |
| Distorted / Crackly Audio | Dirty speaker grilles, damaged cable, software EQ settings too high, audio file quality, dirty earcups, water damage. |
| Bluetooth Dropping / Not Pairing | Out of range, interference, low battery, device needs restart, needs re-pairing, outdated drivers/software. |
| Microphone Not Working | Microphone muted, incorrect mic selected, app/OS permissions denied, damaged microphone. |
| Weak or Distorted Bass | Poor earcup seal, worn earpads, EQ settings, damaged driver. |
When to Consider Professional Help or Replacement
While these troubleshooting steps cover most common issues, there are times when the problem might be beyond a simple fix.
- Persistent Issues: If you’ve tried all the relevant steps and the problem persists, especially if you suspect internal damage (e.g., after a drop).
- Physical Damage: Visible cracks in the headband, severe damage to the earcups, or a frayed cable that can’t be replaced.
- Water Damage: Any electronics exposed to significant water are at high risk of permanent damage.
- Warranty: If your headphones are still under warranty, contact the manufacturer first. Tampering with them yourself might void the warranty. Check out ConsumerAdvice.gov for general advice on electronics care and common warranty terms.
In these cases, it might be time to contact the manufacturer for repair options, or to consider purchasing a new pair. It’s always a bummer, but sometimes technology has a limited lifespan, or accidents happen.
Frequently Asked Questions (FAQ)
Q1: Can I use a different cable if my original headphone cable is damaged?

A1: Yes, often! If your over-ear headphones use a detachable cable with a standard connector (like 3.5mm or 2.5mm), you can usually replace it with a compatible cable. Ensure the connector type and size match what your headphones and device require. Using a cable of similar or better quality is recommended.
Q2: My headphones are noisy – is this a headphone problem or my computer?

A2: This is a great question! “Noise” can mean different things. If it’s a constant hiss, it might be inherent to the headphones’ amplifier or the audio source. If it’s clicking or popping, it could be a bad cable, a poor connection, or issues with your computer’s audio drivers or power supply. Testing on a different device (like a phone) is the best way to isolate if the headphones are the source of the hiss or if your computer is introducing it.
