
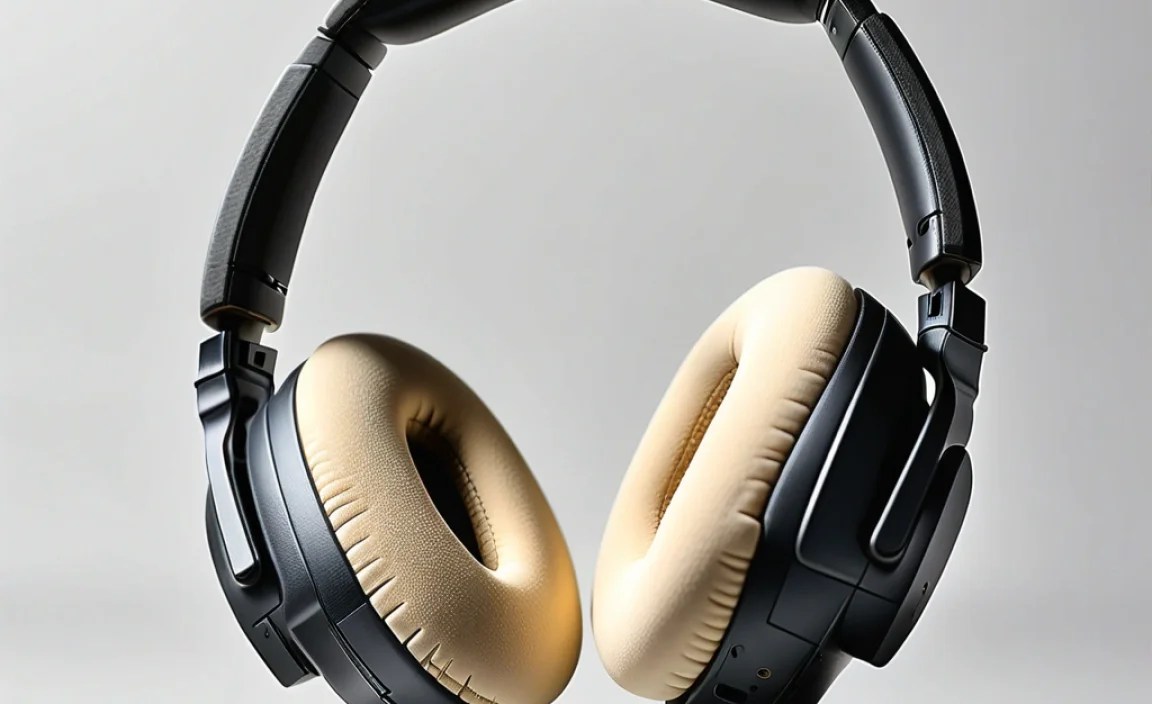
Revitalize your Sony headphones with new ear pads! This guide shows beginners how to easily replace worn earpads, restoring comfort and sound quality for an essential audio upgrade. Learn how to choose and install the perfect fit.
Replacement Earpads for Sony Headphones: An Essential Upgrade
Hey there, audio adventurers! Edward Cavitt here from Headphone Horizon. We all love our Sony headphones – they’re fantastic companions for music, movies, and everything in between. But over time, even the most comfortable ear pads can start to show wear and tear. They might get a bit flat, lose their cushioning, or even start to peel. It’s a common story for headphone lovers! The good news is, this doesn’t mean you need to buy a whole new pair of headphones. Replacing your Sony headphone earpads is a simple, cost-effective, and incredibly rewarding upgrade. It’s like giving your beloved headphones a brand-new lease on life, bringing back that plush comfort and clear sound you first fell in love with. Let’s dive in and see how easy it is to make this essential upgrade!
Why Replace Your Sony Headphone Earpads? The Comfort and Sound Connection

Your headphone earpads do more than just sit on your ears. They play a crucial role in both comfort and sound quality. As they age, they can:
- Lose their cushioning: This leads to discomfort during long listening sessions, with the headphones feeling hard or digging into your ears.
- Degrade sound isolation: Worn earpads can create gaps, allowing ambient noise to leak in and your music to leak out. This means you might turn up the volume more, which isn’t great for your hearing.
- Alter sound signature: A compromised seal can actually affect the bass response and overall clarity of your audio.
- Become unhygienic: Over time, earpads absorb sweat and oils, becoming a breeding ground for bacteria.
Replacing them is as simple as putting on new socks for your headphones, and the benefits are immediate. You’ll rediscover that original comfort and often notice an improvement in sound clarity due to a better seal. It’s a worthwhile investment that can significantly extend the lifespan and enjoyment of your headphones. For more on the importance of headphone maintenance, you can check out general audiophile care tips from sources like Crutchfield.
Choosing the Right Replacement Earpads for Your Sony Headphones

This is where things get exciting! The market offers a variety of replacement earpads, so finding the perfect fit for your Sony headphones is key. Here’s what to consider:
1. Identify Your Sony Headphone Model
This is the absolute first step. Your earpads are designed to fit specific headphone models. Look for the model number on the headband, earcups, or the original packaging. Common Sony models include the WH-1000XM series (XM3, XM4, XM5), MDR-XB series, WH-CH series, and so on. Knowing your exact model (e.g., Sony WH-1000XM4) is crucial for compatibility.
2. Material Matters: What’s Your Comfort Preference?
Earpad materials significantly impact comfort, durability, and even sound.
Common Earpad Materials:
- Protein Leather (PU Leather): This is the most common material for aftermarket earpads. It’s designed to mimic real leather, offering a smooth feel and good durability. It’s often budget-friendly and easy to clean. On the downside, it can sometimes feel less breathable than fabric options, potentially leading to sweaty ears during long sessions.
- Genuine Leather: Offers premium feel and durability. It’s often more breathable than PU leather but comes at a higher price point and requires more care.
- Velour/Fabric: These earpads are highly breathable and soft, making them excellent for long listening sessions, especially in warm environments. They offer a different, often softer, feel compared to leather. A potential drawback is that they can absorb moisture more readily and might not offer the same level of passive noise isolation as sealed leather pads.
- Memory Foam: Often found as the core material within leather or fabric earpads, memory foam contours to your head for exceptional comfort and a good seal.
3. Sound Isolation and Acoustic Properties
The material and thickness of the earpad affect how well your headphones block out external noise and how the sound from your drivers reaches your ears. Thicker earpads or those with better sealing materials (like protein leather) generally provide better passive noise isolation. If you’re in a noisy environment, this is a big plus. If you prefer an open and airy sound, or are sensitive to bass emphasis, you might consider velour or thinner pads, though this is a more advanced consideration.
4. Durability and Lifespan
Aftermarket earpads can vary in quality. Look for reviews that mention durability and how well the material holds up over time. Protein leather can sometimes crack or peel after extended use, while well-made velour pads can last a long time. Genuine leather, if properly cared for, is often the most durable.
5. Ease of Installation
Most replacement earpads are designed for relatively easy user installation. However, some might be trickier than others, especially if they require more intricate clips or adhesives. Most common Sony models feature clip-on or push-fit designs that don’t require special tools.
Where to Buy Replacement Earpads
You have several reliable options for purchasing replacement earpads:
- Reputable Online Retailers: Amazon, eBay, dedicated headphone accessory sites (like Newfrog, Dekoni Audio (for premium options), or Brainwavz).
- Manufacturer Websites: While less common for aftermarket, sometimes Sony may offer official replacement parts.
When searching, use terms like “Sony WH-1000XM4 replacement earpads” or “MDR-XB950N1 ear pads” to narrow down your results.
Step-by-Step Guide: Replacing Your Sony Headphone Earpads

Don’t worry, this process is usually straightforward and doesn’t require any technical expertise. Most earpads can be replaced in under 15 minutes.
What You Might Need (Usually Nothing!)
For most Sony headphone models, you won’t need any tools. If your specific model has particularly stubborn clips, you might want:
- A plastic pry tool (often included with aftermarket earpads)
- A small, flathead screwdriver (use with extreme caution to avoid damage)
- A soft cloth for cleaning
Always check the instructions that come with your new earpads, as they might have specific recommendations.
Step 1: Gently Remove the Old Earpads
This is the most “delicate” step. The method varies slightly by model.
Common Removal Methods:
- Prying/Snapping Off: Many Sony earpads are attached with small plastic clips around the edge. You can usually gently work your fingernail or a plastic pry tool around the seam between the earcup and the earpad. Apply gentle pressure and work your way around. You’ll feel or hear small clicks as the clips release. The pad should then lift away.
- Tucking Under a Lip: Some earpads might have a lip that tucks under a rim on the earcup. In this case, you’ll need to gently find the edge and pull it out from under the rim. Start at one point and carefully un-tuck the material all the way around.
Tip: Be patient! Don’t force it. If it feels like you’re using too much pressure, try a different spot or technique. You can often find YouTube videos demonstrating earpad replacement for your specific Sony model. Searching “Sony WH-1000XM4 earpad replacement” on YouTube will yield many helpful visual guides.
Step 2: Clean the Earcup Housing
Once the old earpads are off, take a moment to clean the earcup surface where the earpads attach. Use a slightly damp, soft cloth to wipe away any accumulated dust, skin oils, or residue. This ensures a clean surface for the new earpads to seal properly.
Step 3: Attach the New Earpads
New earpads are typically designed with a specific orientation.
Installation Process:
- Align the Earpad: Most earpads have a specific way they fit. Look for any markings or ensure the seam/stitching aligns correctly with the earcup. For clip-on types, you’ll generally see small tabs or indentations on the new earpad that correspond to the slots on the earcup.
- Clip/Press into Place: Starting at one point (often where a clip or tab is most prominent), align the new earpad’s edge with the earcup. Gently press down. Work your way around the earcup, pressing the edge of the new earpad into the groove or against the clips. You should feel or hear satisfying clicks as they snap into place securely.
- Check the Seal: Once attached, gently run your finger around the edge of the earpad to ensure it’s fully seated and there are no gaps between the earpad and the earcup. A good seal is crucial for comfort and sound.
Important Note: Some earpads might come with adhesive. If yours do, carefully peel off the backing and align the earpad precisely before pressing down firmly. Once adhesive earpads are in place, they can be difficult to reposition.
Step 4: Test Your Newly Upgraded Headphones
Put your headphones back on! Notice the immediate difference in comfort. Play some of your favorite tracks and appreciate the revived sound quality. Ensure there are no rattles or loose parts.
Popular Sony Headphone Models and Earpad Compatibility

While specific part numbers vary, understanding common models can help you navigate your search. Here’s a general idea:
| Sony Headphone Series | Common Models | Earpad Material (Typical Aftermarket) | Installation Style |
|---|---|---|---|
| WH-1000XM | WH-1000XM3, WH-1000XM4, WH-1000XM5 | Protein Leather, Velour | Clip-on / Push-fit |
| MDR-XB (Extra Bass) | MDR-XB950BT, MDR-XB950N1, MDR-XB950AP | Protein Leather, Foam | Push-fit / Tucking |
| MDR-1A / 1R | MDR-1A, MDR-1R, MDR-1RMK2 | Protein Leather, Velour | Clip-on / Push-fit |
| WH-CH Series | WH-CH500, WH-CH510, WH-CH520 | Faux Leather, Fabric | Often Sewn-in or specific fitting |
Note: Always verify compatibility with your exact model number when purchasing. This table is a general guide.
Troubleshooting Common Issues
Even with simple tasks, sometimes a hiccup can occur. Here are a few common issues and how to solve them:
Issue: Earpads won’t snap into place.
Solution: Double-check that you have the correct earpads for your specific model. Ensure there isn’t any debris in the slots on the earcup or on the earpad clips. Try aligning from a different starting point. Sometimes, a slight bend or twist is needed, but be very gentle.
Issue: New earpads feel loose or create a gap.
Solution: This can happen if the earpad isn’t fully seated. Go around the perimeter and ensure every clip or edge is pressed firmly into place. If it’s a model with adhesive, ensure it was applied evenly and pressed down firmly immediately after placement.
Issue: Sound quality seems muffled or bass is weak.
Solution: This usually indicates a poor seal. Re-check that the earpads are fully attached all the way around. Ensure no part of the earpad material is obstructing the driver. If you purchased velour pads and your original were leather, a slight change in bass response is possible due to the different acoustic properties. This is normal, but a significant muffling usually points to a seal issue.
Issue: Earpads are uncomfortable after installation.
Solution: Give them a little time! New earpads, especially those with memory foam, often need a few hours of wear to break in and conform to your head shape. If they remain uncomfortable, consider if you chose the right material for your preferences (e.g., if you prefer softness, velour might be better than firm protein leather).
Frequently Asked Questions (FAQs)
How often should I replace my headphone earpads?
It depends on usage and material, but generally, every 6-12 months is a good guideline for daily users. If you notice significant wear, reduced comfort, or a decline in sound isolation, it’s time for a change.
Can I use earpads from a different brand on my Sony headphones?
Yes, as long as they are specifically designed and advertised to be compatible with your Sony headphone model. Many third-party manufacturers create earpads for popular headphone lines.
Will replacing earpads affect my Sony headphones’ active noise cancellation (ANC)?
The passive seal created by earpads is important for ANC. If new earpads create a better seal, they might actually improve ANC performance. Conversely, a poorly fitting or leaky new earpad could degrade ANC. Stick to earpads designed for your model for the best results.
Are genuine Sony earpads better than aftermarket ones?
Genuine earpads are guaranteed to fit and match the original acoustic properties. However, high-quality aftermarket earpads can offer comparable or even superior comfort and durability, often at a lower price. It’s worth checking reviews for specific aftermarket brands.
What’s the difference between protein leather and real leather earpads?
Protein leather (PU leather) is a synthetic material made to look and feel like real leather. It’s generally more affordable and easier to clean. Real leather is genuine animal hide, offering a premium feel, potentially better breathability, and higher durability but at a greater cost and requiring more care.
My Sony headphones are quite old. Is it still worth replacing the earpads?
Absolutely! If the headphones themselves are still functioning well, replacing the earpads is one of the most impactful and cost-effective ways to restore comfort and sound quality, giving your older headphones a new lease on life. It’s a fantastic way to avoid purchasing new ones unnecessarily.
Conclusion: Enjoy Your Refreshed Audio Experience!
See? Replacing your Sony headphone earpads is a straightforward process that makes a world of difference. You’ve armed yourself with the knowledge to identify the right replacements, confidently install them, and troubleshoot any minor hiccups. This simple upgrade not only restores that “like new” comfort but also helps maintain optimal sound quality and hygiene. It’s a testament to how a little care can go a long way in extending the life and enjoyment of your favorite audio gear. So go ahead, give your Sony headphones the pampering they deserve, and get ready to immerse yourself in crystal-clear sound and supreme comfort once again. Happy listening!
