
Quick Summary: Wireless headphones with a transmitter connect directly to your TV, offering freedom from wires and improved audio clarity without disturbing others. This guide explains how to set them up, choose the right pair, and troubleshoot common issues, making cinematic sound accessible and stress-free.
Wireless Headphones for TV with Transmitter: Your Essential Home Entertainment Upgrade

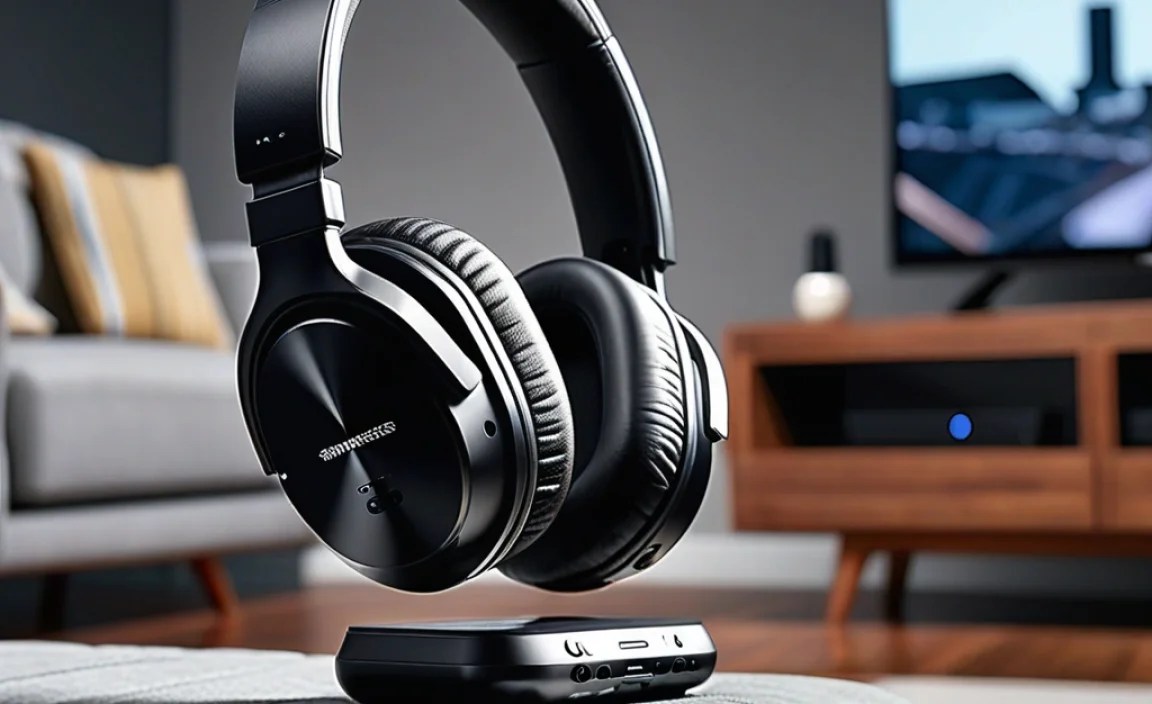
Hey there, audio adventurers! Edward Cavitt here from HeadphoneHorizon. Ever found yourself struggling with tangled cords, straining to hear that crucial dialogue, or worrying about waking up the household during your late-night movie marathons? If so, you’re in the right place! Wireless headphones specifically designed for TV, complete with their own transmitter, are an absolute game-changer. They’re not just a convenience; they’re a proven essential for anyone looking to truly immerse themselves in their favorite shows and movies. Forget complicated setups and fuzzy connections. This guide will walk you through everything you need to know to get crystal-clear, uninterrupted sound directly from your TV to your ears, all without the hassle.
Why Wireless Headphones with a Transmitter are a TV Listener’s Best Friend

The digital age brings us amazing audio fidelity, but sometimes, our living rooms don’t quite keep up. Traditional TV speakers or even wired headphones can have limitations. Wireless headphones that come with a dedicated transmitter tackle these common frustrations head-on, offering a seamless and superior listening experience.
Freedom from Wires, Freedom to Enjoy
The most obvious benefit is the liberation from cumbersome cables. No more tripping hazards, no more restrictive range, and no more awkward fumbling to plug them in. You can easily move around your living room, grab a snack from the kitchen, or even step out onto your balcony while staying connected to the audio. This freedom is especially valuable for less mobile individuals or those who like to multitask while enjoying their shows.
Crystal-Clear Dialogue and Immersive Sound
Many wireless TV headphone systems are engineered to enhance spoken dialogue. They often feature advanced audio processing that boosts vocal frequencies, making it easier to catch every word, even during explosive action scenes. Beyond dialogue, they deliver rich, full soundscapes that pull you deeper into the movie or game. This is a significant upgrade from the tinny sound often produced by built-in TV speakers.
No More Disturbing Others
This is a huge one for many households! Whether you’re an early bird catching the news before anyone else is awake, a night owl binging a series, or you simply live with people who have different entertainment tastes, independent audio is a lifesaver. You can crank up the volume to your heart’s content without disturbing your partner’s sleep, your children’s study time, or your housemates’ quiet evening. It’s a win-win for everyone.
Simplified, Reliable Connection
Unlike Bluetooth headphones that can sometimes be finicky to pair and maintain a stable connection, systems with a dedicated transmitter usually offer a simpler, more robust setup. The transmitter connects directly to your TV’s audio output, and the headphones are pre-paired or easily paired with that specific transmitter. This creates a dedicated, often low-latency link, minimizing audio delays (lip-sync issues) which are crucial for an enjoyable viewing experience. As the Federal Communications Commission (FCC) advises, understanding how different wireless devices communicate can help you choose reliable options to avoid interference.
Choosing Your Perfect Wireless TV Headphone System with Transmitter

With a growing market, selecting the right system can feel overwhelming. But don’t worry, we’ll break down the key features to look for:
Types of Transmitters/Connectivity
The way the transmitter connects to your TV is paramount. Here are the most common options:
- Optical (TOSLINK): This is a digital audio connection that provides excellent sound quality and is very common on modern TVs. It often offers the lowest latency, which is great for avoiding lip-sync issues. It uses a light signal to transmit audio.
- 3.5mm (Auxiliary): A classic analog audio connection. Most TVs have a headphone jack or an audio-out port that uses this connection. It’s widely compatible but might not deliver the absolute best audio fidelity compared to optical.
- RCA (Red/White Connectors): These are analog audio outputs, usually red and white jacks. Many older TVs and some modern ones still feature these. Adapters are readily available if your TV only has one of these.
- HDMI (ARC/eARC): Some advanced systems may connect via HDMI, particularly using the Audio Return Channel (ARC) or eARC feature. This allows audio to be sent back from the TV to the transmitter, often offering high-quality audio formats and simpler cable management if your TV supports it.
Headphone Style and Comfort
- Over-Ear: These completely enclose your ears, offering excellent passive noise isolation and comfort for long listening sessions. They are generally bulkier.
- On-Ear: These rest on your ears. They are lighter and more breathable but offer less noise isolation and can sometimes cause discomfort after extended use.
- In-Ear (Earbuds): While less common for dedicated TV systems due to the need for a secure, stable fit for long periods, some compact systems might use in-ear designs.
Battery Life and Charging
Consider how long you typically watch TV in one sitting. Most wireless TV headphones offer several hours of playback on a single charge. Look for systems that use rechargeable batteries and ideally have a charging stand or dock, which makes powering them up between uses incredibly convenient. Some come with a spare battery that you can swap in, ensuring uninterrupted viewing.
Range and Interference
The ideal range will depend on your living space. Most systems offer a range of 50-100 feet (15-30 meters), which is usually ample for most homes. Newer technologies use frequencies less prone to interference from other household devices, ensuring a stable connection. Read reviews to see how well the headphones maintain their signal in real-world conditions.
Latency (Audio Delay)
This is CRITICAL for watching video. Latency is the slight delay between the video and the audio. If the audio appears after the on-screen action, it’s incredibly distracting. Systems using RF (Radio Frequency) or their own dedicated wireless protocols (often proprietary) tend to have much lower latency than standard Bluetooth, especially when paired with a specific transmitter. Look for terms like “low latency” or “near-zero latency” in the product description. For further reading on audio concepts like latency, resources from organizations like the Audio Engineering Society (AES) can provide deeper insights, though often technical.
Ease of Use
For beginners, simplicity is key. Look for systems with easy plug-and-play setup, intuitive volume controls on the headphones, and straightforward charging. Avoid overly complex menus or configuration options unless you’re technically inclined.
Setting Up Your Wireless TV Headphones with Transmitter: A Step-by-Step Guide

Getting your new audio setup running is usually quite straightforward. Here’s a general guide:
Step 1: Unpack and Identify Components
Carefully unpack your new wireless headphone system. You should typically find:
- The wireless headphones
- The transmitter base/dock
- Power adapter for the transmitter
- Audio cable(s) (e.g., optical, 3.5mm, RCA)
- User manual
Step 2: Connect the Transmitter to Your TV
This is the most crucial step. Choose the best available audio output on your TV and connect it to the corresponding input on the transmitter using the provided cable.
Option A: Optical Connection (Recommended for Digital TVs)
- Locate the rectangular “Optical Out” or “Digital Audio Out” port on your TV.
- Find the matching optical port on your transmitter.
- Remove the protective plastic caps from both ends of the optical cable.
- Firmly insert one end into the TV’s optical out port and the other into the transmitter’s optical in port. The connection should click into place.
Option B: 3.5mm (Aux) Connection
- Find the headphone jack (usually labeled with a headphone icon) or “Audio Out” port on your TV.
- Connect one end of the 3.5mm cable to the TV’s audio output.
- Connect the other end to the 3.5mm input on your transmitter.
Option C: RCA Connection
- Locate the red and white “Audio Out” ports on your TV.
- Use an RCA to 3.5mm adapter if your transmitter only has a 3.5mm input, or use an RCA-to-RCA cable if your transmitter has RCA inputs.
- Connect the red and white cables (or the adapter) to the corresponding colored ports on your TV and then to the transmitter.
Step 3: Power Up the Transmitter and TV
Plug the transmitter’s power adapter into a wall outlet and connect it to the transmitter. Turn on your TV.
Step 4: Configure Your TV’s Audio Settings
This step is vital for ensuring the sound is routed correctly. You’ll need to adjust your TV’s audio output settings:
- Navigate to your TV’s settings menu (usually accessible via a remote control button like “Menu,” “Settings,” or a gear icon).
- Look for “Audio,” “Sound,” or “Speaker” settings.
- If you connected via Optical or HDMI ARC/eARC, select “External Speakers,” “Audio Out / Optical,” or a similar option. Disable “TV Speakers.”
- If you used a 3.5mm or RCA connection, select “Headphone” or “Audio Out.” Disable “TV Speakers.”
- For Optical output, you might need to select the audio format. “PCM” is usually the safest bet for compatibility. Avoid Dolby Digital unless your headphones specifically support it and you’re experiencing issues with PCM.
Refer to your TV’s user manual if you’re having trouble locating these settings.
Step 5: Power On Your Headphones
Turn on your wireless headphones. They should automatically attempt to connect to the transmitter. Most systems will have an indicator light showing the connection status (e.g., solid light for connected, flashing light for trying to connect).
Step 6: Test the Audio
Play some content on your TV. You should start hearing sound through your headphones. Adjust the volume using the controls on the headphones themselves. If you don’t hear anything, double-check all your cable connections and TV audio settings.
Step 7: Adjust Within the Headphones
Most TV headphone systems allow you to adjust volume directly on the earcup. Some may also offer basic EQ settings or balance controls. Experiment with these to find what sounds best for your listening preferences.
Troubleshooting Common Issues
Even the best technology can sometimes act up. Here are some common problems and how to fix them:
| Problem | Potential Cause | Solution |
|---|---|---|
| No Sound | Transmitter not powered on. | Ensure the transmitter is plugged in and powered on. Check its indicator lights. |
| Headphones not powered on or not connected. | Turn on the headphones. Ensure they are paired with the transmitter (check manual for re-pairing instructions if needed). | |
| Incorrect TV audio output selected. | Go back to your TV’s audio settings and ensure you’ve selected the correct output (Optical, Headphone, etc.) and disabled TV speakers. | |
| Loose cable connections. | Unplug and firmly re-insert all audio cables between the TV and the transmitter. | |
| Audio Delay (Lip Sync Issues) | Using standard Bluetooth without a low-latency transmitter. | Ensure your system is designed for low latency. If using a system with multiple input options, try switching to Optical if available. |
| High latency from TV processing. | Some TVs have an “AV Sync Adjustable” or “Lip Sync” setting. Try adjusting this if available. Check if your transmitter offers a latency adjustment. | |
| Interference or Static | Signal obstruction or interference from other devices. | Move the transmitter away from other Wi-Fi routers, microwaves, or Bluetooth devices. Ensure a clear line of sight between the transmitter and headphones if possible. |
| Low battery on headphones. | Charge the headphones fully. | |
| Headphones not charging | Charger not properly connected or faulty. | Ensure the charging dock/cable is securely connected to both the transmitter/dock and the power source. Try a different power outlet. |
| Charging contacts dirty/corroded. | Gently clean the charging pins on both the headphones and the charging dock with a dry cotton swab. | |
| Volume too low | Volume set too low on headphones or TV. | Turn up the volume on the headphones and check if the TV’s audio out volume is set to maximum (or a high level). |
If problems persist, consulting the manufacturer’s support website or their official documentation is always a good next step. Reputable brands often have extensive FAQs and troubleshooting guides.
Popular Wireless TV Headphone Systems to Consider
While specific models can change rapidly, here are some trusted brands known for producing reliable wireless TV headphone systems with transmitters:
- Sennheiser: Often praised for their audio quality and robust RF wireless technology, offering excellent range and low latency. Their RS series is particularly popular for TV use.
- Avantree: They offer a wide range of affordable and effective Bluetooth transmitters and headphone sets, often with a strong focus on low latency and ease of use.
- Artiste: Known for providing good value, Artiste systems often include a transmitter and headphones designed for TV, usually with straightforward setups.
- Sony: While more focused on Bluetooth, some Sony models come with dedicated transmitters and are known for comfort and sound quality.
- Bose: Primarily known for their premium noise-canceling headphones, some Bose models offer dedicated transmitters for a seamless TV experience, albeit at a higher price point.
Always check recent reviews and compare features to match your specific needs and budget. Look out for technologies like aptX Low Latency (if considering Bluetooth-based systems with transmitters) which is designed to minimize audio delay.
For more in-depth reviews and product comparisons, you can often find helpful, unbiased information on tech review sites like Rtings.com or CNET, which do extensive testing on audio equipment.
Frequently Asked Questions (FAQs)
Q1: Can I use regular Bluetooth headphones with my TV and a transmitter?
A: Most standard Bluetooth headphones pair directly with devices that have Bluetooth built-in. To use them with a TV that doesn’t have Bluetooth, you would generally connect a separate Bluetooth audio transmitter (often designed for TVs) to your TV’s audio output (like optical or headphone jack). However, ensure the transmitter and headphones both support a low latency codec (like aptX Low Latency) to avoid lip-sync issues. Dedicated wireless TV headphone systems with their own transmitters are usually optimized for this specific purpose and often provide a more stable, lower-latency experience.
Q2: How do I know if my TV has an optical audio output?
A: Look on the back or side panel of your TV for a port labeled “Optical,” “Digital Audio Out,” or “TOSLINK.” It’s usually a small, often square-ish port with a little door that can be opened. These ports use a fiber optic cable to transmit digital audio signals, offering excellent sound quality and low latency.
Q3: Will a wireless TV headphone system work with my soundbar?
A: This depends on the audio outputs available on your TV. If your TV has a separate “Audio Out” (like Optical, 3.5mm, or RCA) that isn’t being used by your soundbar, you can connect the wireless transmitter to that port. However, most soundbar setups use HDMI ARC/eARC or optical ports exclusively. You typically cannot split the audio signal to go to both a soundbar and a wireless transmitter simultaneously using a single port. You might need to consider smart TV apps or other audio distribution solutions if you want to use both simultaneously.
Q4: What is latency, and why is it important for TV headphones?
A: Latency is the delay between when audio is produced by the TV and when you hear it through your headphones.
