
Do you love listening to music or playing games with your over-ear headphones? They can be your best friend during long hours of fun. However, keeping them clean is important too. Dirty headphones can ruin the sound and even cause ear infections. Yikes!
Have you ever noticed how quickly dirt and sweat collect on your headphones? It’s like magic, but not the good kind! Regularly cleaning your headphones helps keep them fresh and safe for your ears.
Did you know that most people forget about headphone hygiene? A fun fact is that cleaning them can actually improve their sound quality! Imagine hearing your favorite tunes just as the artist intended. Sounds great, right?
If you’re wondering how to clean headphones for over-ear headphones, don’t worry. We will guide you through simple steps. By the end, your headphones will look and sound as good as new!
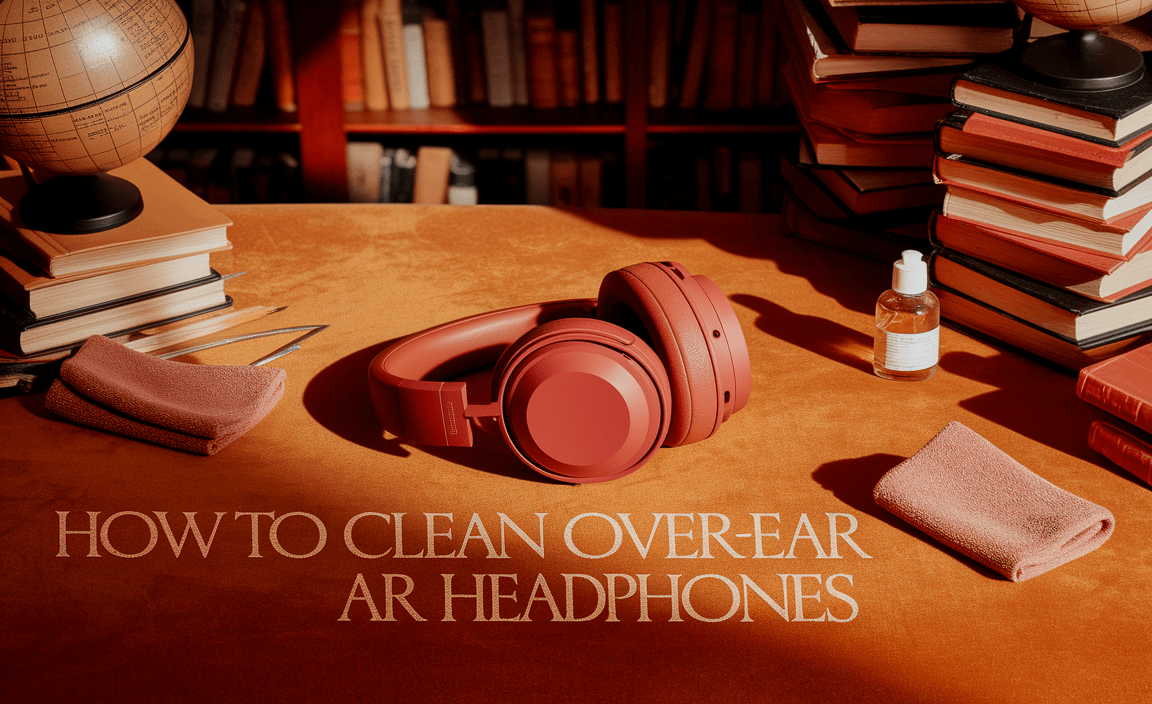
How to Clean Over-Ear Headphones
Cleaning your over-ear headphones can improve sound quality and comfort. Start by removing ear pads if possible. Use a damp cloth with mild soap to wipe the headband and ear cups. Don’t forget the audio jack; dirt can build up there too! A surprising fact: clean headphones can enhance your listening experience. Regular cleaning not only keeps them looking good but also helps them last longer. Why not give it a try today?

Why Cleaning Your Over-Ear Headphones is Important

Discuss buildup of dirt and sweat. Explain potential health risks and maintenance benefits.
Over-ear headphones may deeply immerse us in our favorite tunes, but they can also gather a lot of dirt and sweat. Yuck! That grime can become a breeding ground for bacteria, which isn’t the best for your ears. Cleaning them can help keep you healthy and extend their life. Plus, who wants to wear headphones that smell like forgotten gym socks? Regular cleaning means better sound and less chance of ear infections. Let’s keep those ears happy!
| Issue | Impact |
|---|---|
| Bacteria Build-up | Can cause ear infections |
| Dirty Ear Cushions | Reduce sound quality |
| Poor Maintenance | Shorten headphone life |
Tools and Materials Needed for Cleaning

List essential cleaning tools (microfiber cloth, cotton swabs, etc.). Recommend cleaning solutions or homemade mixtures.
To clean your over-ear headphones, you need a few key tools. Start with a microfiber cloth for wiping surfaces. Use cotton swabs to reach tiny spaces. A gentle brush can help with dirt in crevices. For cleaning solutions, mix equal parts of water and vinegar or use isopropyl alcohol. These homemade solutions work wonders!
- Microfiber cloth
- Cotton swabs
- Soft brush
- Water and vinegar solution
- Isopropyl alcohol
What should I avoid when cleaning headphones?
Avoid using harsh cleaners or soaking your headphones. This can damage the materials and harm the sound quality.
Step-by-Step Cleaning Process
Detail disassembly instructions (if applicable). Provide a thorough cleaning method for ear cushions and headband.
Cleaning your over-ear headphones is easy and fun. Start by taking off the ear cushions. Gently pull them away from the headband until they pop off. Next, grab a damp cloth. Wipe the ear cushions and headband to remove dirt and grime. Use mild soap and water for tough spots. Let everything dry before putting them back together. This will help keep your headphones working great and looking clean!
How do I clean my headphone cushions?
You can clean headphone cushions by using a damp cloth with mild soap. Wipe gently and let them dry before use.
Disassembly Instructions:
- Carefully pull off ear cushions.
- Don’t pull too hard.
- Check for any clips or buttons to release.
Cleaning Method:
- Use a soft damp cloth.
- Add a drop of mild soap if needed.
- Wipe the headband and cushions thoroughly.
- Allow to air dry completely.
Cleaning the Ear Drivers
Instructions on safe cleaning methods for ear drivers. Precautions to avoid damage during cleaning.
Cleaning the ear drivers is essential for good sound quality. Start by turning off your headphones. Use a soft, dry cloth to gently wipe the outer parts. If you spot dirt, a slightly damp cloth with warm water will work wonders. Avoid chemicals; they can be harmful. Don’t forget, no poking! You might accidentally damage the drivers. Let’s keep those tiny speakers safe and sound! Here’s a handy table for you:
| Cleaning Method | Precaution |
|---|---|
| Soft dry cloth | Best for outer areas |
| Damp cloth with warm water | Avoid harsh chemicals |
| Q-tip for tiny crevices | Gentle touch only! |
Dealing with Wired Connections

Tips for cleaning headphone jacks and cords. Importance of checking for frays and damage.
Wired headphones can be a bit messy sometimes, especially at the jacks and cords. Use a soft cloth or cotton swab to gently clean the headphone jack. You want it dirt-free, like a shiny new penny! Also, look closely for any frays or damage on the cords. Cords can become like spaghetti after a good party, but broken ones can ruin your music experience. It’s better to fix or replace them than to risk a sound disaster!
| Tip | Action |
|---|---|
| Clean the Jack | Use a soft cloth or cotton swab. |
| Check for Frays | Look for wear and tear on cords. |
| Replace if Needed | Avoid sound issues by changing damaged cords. |
Cleaning Frequency: How Often Should You Clean?
Suggested cleaning schedules based on usage. Signs that indicate it’s time to clean your headphones.
Keeping your headphones clean is important for both sound quality and hygiene. If you use them daily, aim to clean them once a week. For occasional use, cleaning once a month should do the trick. Watch for signs like dirt buildup or a funky smell—these are clear signs it’s time for a cleaning spree. Remember, dirt on your headphones might not make them look cool!
| Usage Frequency | Cleaning Schedule |
|---|---|
| Daily | Once a week |
| Weekly | Once a month |
| Rarely | Every few months |
Common Mistakes to Avoid When Cleaning Headphones
List frequent errors that can lead to damage. Provide alternative methods to ensure safe cleaning.
Many people make simple mistakes while cleaning their headphones. One big error is using too much water, which can ruin the sound. Another mistake is using harsh chemicals that can harm the material. Instead, try using a soft cloth and a little bit of rubbing alcohol. Gentle scrubbing goes a long way! If you get a stubborn stain, just use a cotton swab. Your headphones will thank you for it!
| Common Mistakes | Safe Alternatives |
|---|---|
| Using too much water | Use a damp cloth |
| Harsh chemicals | Rubbing alcohol or mild soap |
| Scrubbing too hard | Gently wipe with a soft cloth |
Additional Care Tips for Over-Ear Headphones
Recommendations for storage and handling. Discuss how to maintain headphone hygiene between deep cleans.
To keep your over-ear headphones in tip-top shape, it’s essential to store them properly. Always put them in a case when not in use. This helps avoid dust and damage, like a superhero cape for your headphones! Make sure to handle them gently; no tossing them on the couch like a basketball!
For daily hygiene, wipe the ear cups with a soft cloth after use. This prevents sweat and dirt buildup, keeping them fresh. If you notice gunk in the crevices, use a small brush for a gentle clean. A little care goes a long way!
| Care Tips | Action |
|---|---|
| Storage | Use a case |
| Handling | Be gentle |
| Daily Clean | Wipe ear cups |
| Deep Clean | Brush crevices |
Conclusion
In conclusion, cleaning your over-ear headphones helps them last longer and sound better. Start by using a soft cloth for the outside. Use a cotton swab for the ear cushions. Don’t forget to clean the wires too! By taking these simple steps, you’ll enjoy clearer sound. For more tips, check other resources or videos online! Happy listening!
FAQs
What Materials Do I Need To Clean My Over-Ear Headphones Effectively?
To clean your over-ear headphones, you need a few simple materials. Get a soft cloth or microfiber cloth. You will also need some water and mild soap. A cotton swab is helpful for small areas. Make sure your headphones are unplugged before you start!
How Often Should I Clean My Over-Ear Headphones To Maintain Hygiene And Sound Quality?
You should clean your over-ear headphones every week or two. Wipe the ear cushions with a soft cloth. Use some water or a gentle cleaner if needed. Make sure to avoid getting any liquid inside the headphones. This way, they stay fresh and sound great!
Are There Any Specific Cleaning Solutions I Should Avoid When Cleaning My Over-Ear Headphones?
Yes, you should avoid using strong cleaners like bleach or ammonia. These can damage the headphones. Instead, use a soft cloth with a little water or gentle soap. Always be careful not to get water inside the headphones.
What Is The Best Method To Clean The Ear Pads And Headband Of Over-Ear Headphones?
To clean the ear pads and headband of your headphones, start by taking them off. Use a soft cloth or a cotton swab with water or a gentle soap. Wipe the pads and headband carefully to remove dirt. Let them dry fully before putting them back on. This keeps your headphones looking and feeling nice!
How Can I Safely Clean The Audio Jack And Other Electronic Components Of My Over-Ear Headphones?
To clean the audio jack and other parts of your headphones, first, unplug them. Use a soft, dry cloth to wipe the outside. For the audio jack, you can use a dry cotton swab to clean inside gently. Avoid using water or cleaning sprays. Make sure everything is completely dry before plugging them back in.
